Model Training
After defining the Agent Coach instance, the administrator initiates the training of the Agent Coach model. The following steps outline specific details on how to effectively train a model:
-
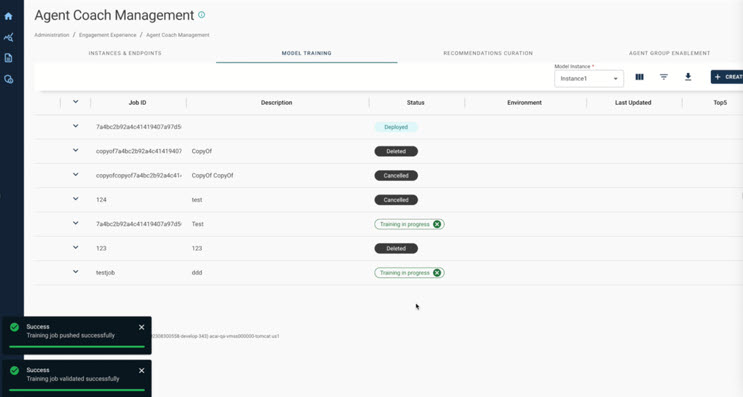
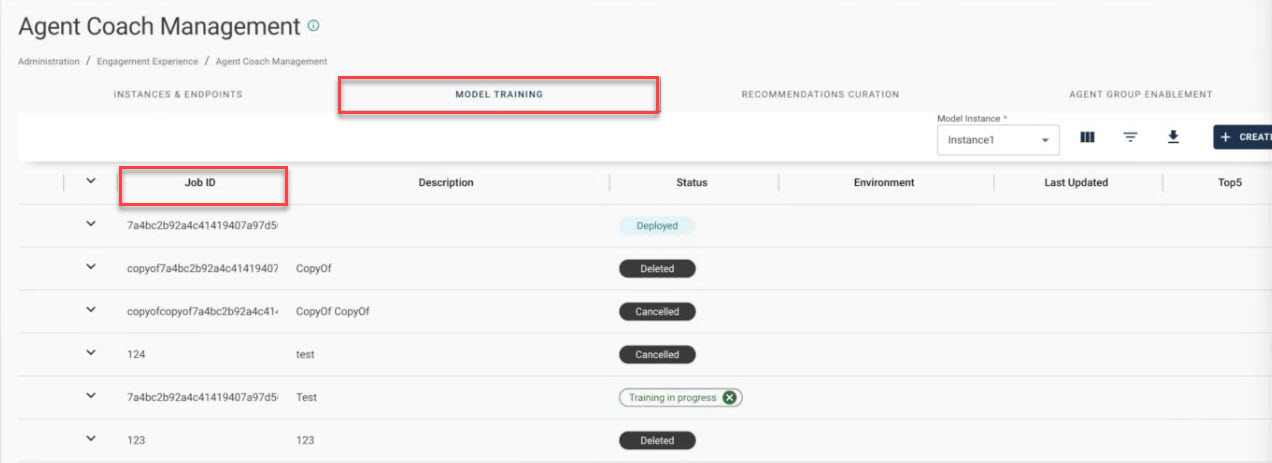
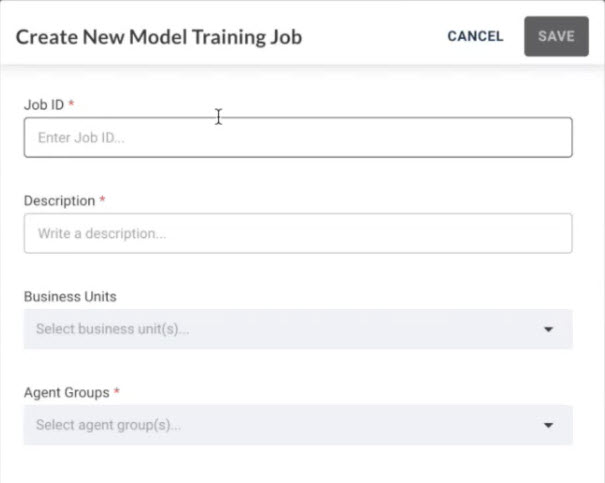
Navigate to the Model Training tab and define the Job ID; it serves as a unique identifier for the Agent Coach model.

-
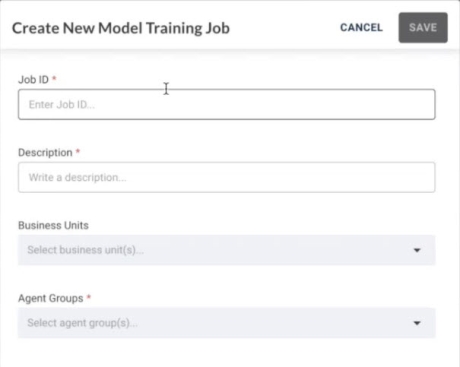
Click the Create button located at the top right corner to display the Create New Model Training Job window.
-
Specify the training Job ID details by providing a meaningful name (for example, include the date), and a Description. Also, select Business Units and Agent Groups from the given drop-down list.
-
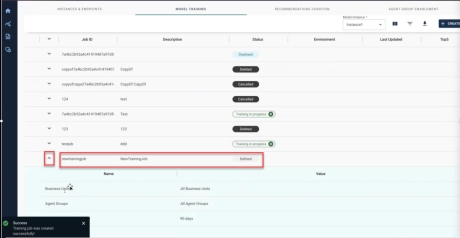
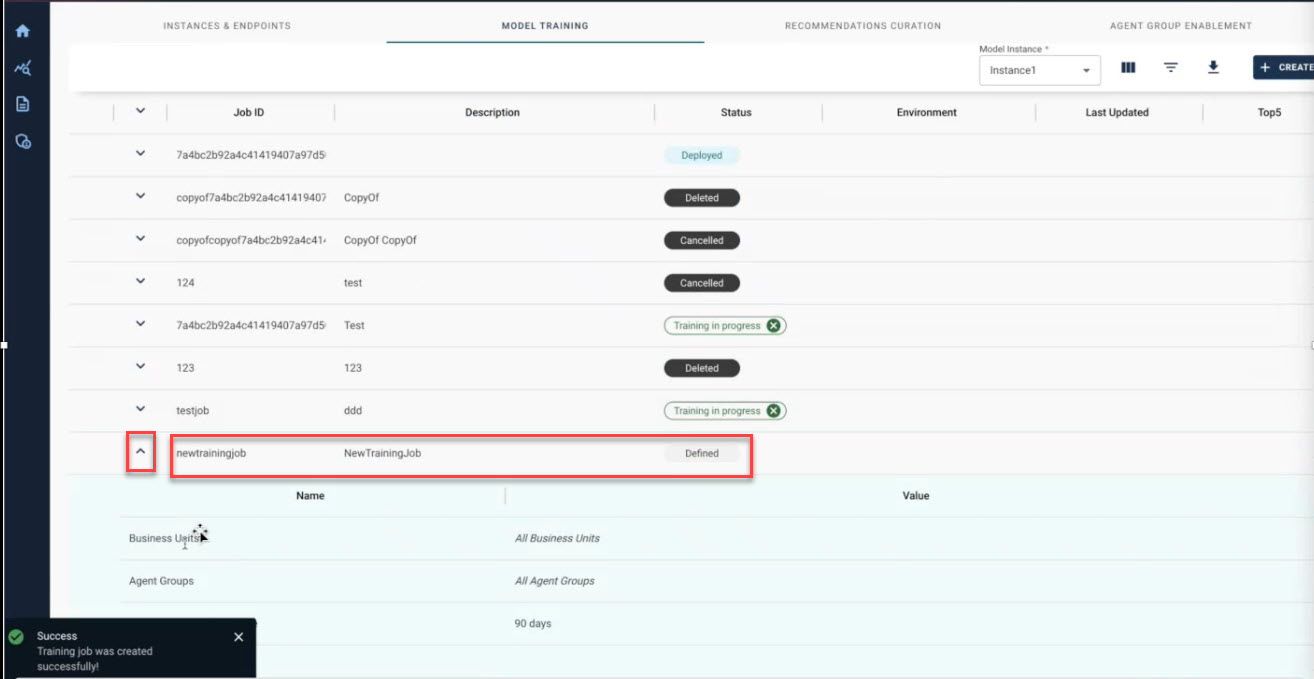
Click Save. The new training Job ID is successfully added to the queue. Now, click the arrow next to the new training Job ID to view all the details and compare the different models.
-
-
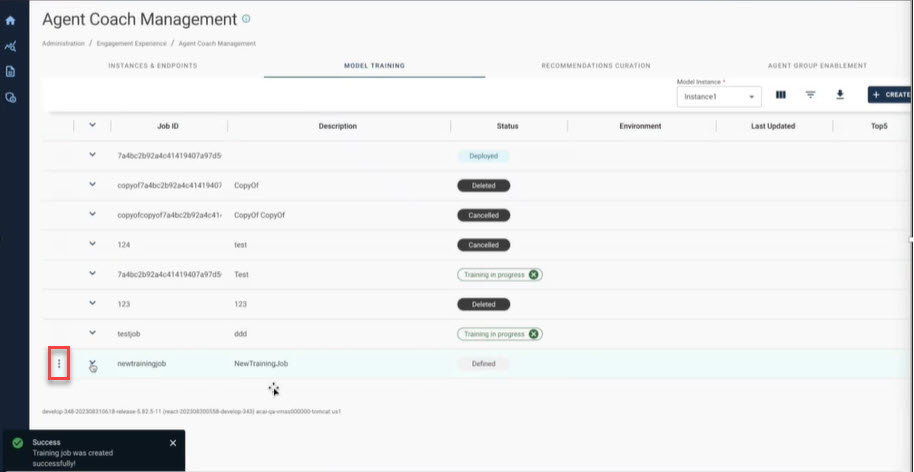
Initiate the Agent Coach model training process by clicking the three dots next to the new training Job ID.

-
The administrator can use the
 icon to access a menu and initiate the training process. The training job is then added to the queue and completed within few hours.
 -
Evaluate the model's quality by using Top5 accuracy, measuring the rate at which the Agent Coach model suggests the correct response within the top five recommendations.
-
-
Deploy the model in the Pre-Production or Production environment.
-
Use the
icon to deploy the model in either the Production or Pre-Production environment.Note: You can deploy only one model to either Pre-Production or Production environment at a time.
-
Administrators can also choose to edit or duplicate the training job, requiring the model to be retrained.
-
-
Finally, the administrator can access more information about the model by using the
 icon.
icon.
Once trained, the model or Job ID becomes associated with a unique response pool, exportable in the Recommedations Curation tab.
Tip: Review the recommendations carefully before you deploy the model.