Agent Disposition
This section provides information on how to manage Agent Disposition categories on the selected website.
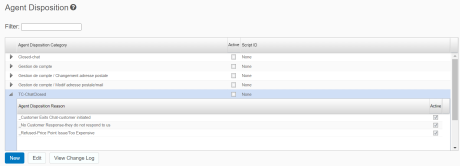
Viewing Agent Disposition categories
To view agent disposition categories for the selected website:
-
Use the buttons to add or change a disposition category.
-
To edit an individual disposition, click the arrow icon next to the category, select the disposition, and use the buttons.
Note: You can enable multiple dispositions in the WorkForce Management System under the Portal.
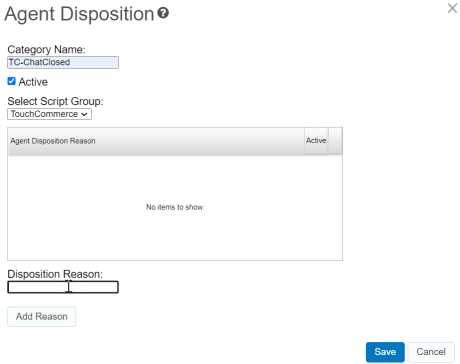
Adding a disposition category
To create a disposition category:
-
From the Agent Disposition table, click New.
-
Enter a name for the new disposition category in the Category Name field.
-
Select a script group
 Script lines are organized into script groups so they can be managed together. Standard script groups include Openers, Discover, Recommend, and Sell. from the drop-down list. The new disposition category is displayed within the script group. For more information about script groups, refer to Script Management.
 -
Add a reason that describes when an agent uses a disposition included in this category. Click Add Reason.
-
Click Save. Your new disposition category is now displayed in the table list.

Adding an Agent Disposition
To create a new agent disposition:
-
From the Agent Disposition table, select a category for the new disposition and click New. The following page displays populated with data from the selected category.
-
Add a disposition reason that describes the agent disposition and click Add Reason. The added reason is displayed in the list.
-
Click Save to save the work.
-
Click Cancel to erase the data.
Tip: When you click Save, the new disposition becomes a part of the selected category. To verify that the new disposition is displayed, you can click the gray triangle next to the disposition category.
Note: All the configured disposition categories and reasons are linked to the script tree associated with the Site or Agent Group. For more information, refer to System Scripts

