Creating custom content
If you belong to the DIY Tableau group (and therefore have sufficient permissions), you can create custom reports and save them into a custom workbook. Perform the following procedure to create new custom content either at the View (report) level or the Workbook level.
Note: When you create custom content, you can only publish it to a workbook in a custom project and not the original workbook in the original project.
Creating content from template
-
If you would like to create custom content from a template at the Workbook level, perform the following sub-steps:
-
In Tableau, at the Site level, select the project containing the workbook you would like to use as a template.
-
At the Project level, under Actions, click the ellipsis (
 ) for the workbook you would like to use as a template, and then click Edit Workbook.
-
-
If you would like to create custom content from a template at the View level, perform the following sub-steps:
-
In Tableau, at the Site level, select the project and then drill down into the workbook containing the standard report you would like to use as a template.
-
At the Workbook level, under Actions, click the ellipsis (
) for the report you would like to use as a template, and then click Edit View.
Note: Alternatively, you can launch the Tableau Web Editor to create a custom view from within the Tableau view you would like to use as a template. To do this, open the template report and click Edit at the top of the page.
-
-
Use the Tableau Web Editor to customize content as desired.
-
When you are ready to publish, click Publish As at the top right of the page.
-
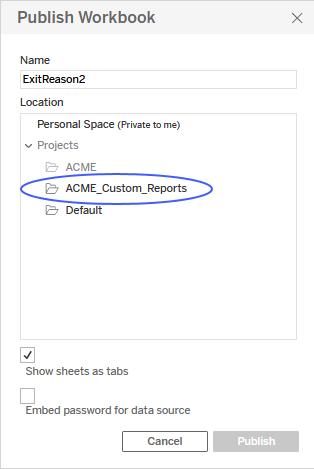
In the Publish Workbook window, enter a name for the custom workbook this content will belong to.
Notes:-
You must enter a unique name for the custom workbook.
-
Under Location, make sure you
 select the custom content project.
-
-
Click Publish.
Creating a workbook from scratch
-
Either at the Site or Project level of Tableau, click New near the top of the page and then click Workbook.
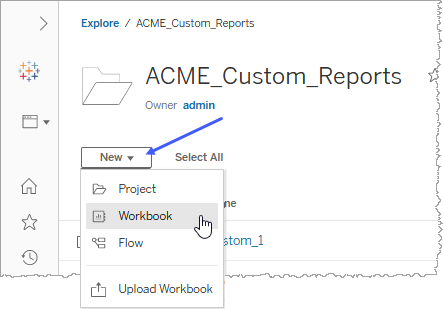
The Connect to Data window appears.
-
Depending on the data your reports are visualizing, select an appropriate data source to meet your workbook's needs, and then click Connect.
The Tableau Web Editor appears with a blank workbook drawing on the data source you specified.
-
Use the Tableau Web Editor to create your content as desired.
-
When you are ready to publish, click Publish As at the top right of the page.
-
In the Publish Workbook window, enter a name for the custom workbook this content will belong to.
Notes:-
You must enter a unique name for the custom workbook.
-
Under Location, make sure youselect the custom content project.
-
-
Click Publish.
