Using calendar controls
Use a calendar control![]() Controls are containers for a group of related, reusable settings that govern service-level operations. Controls include Campaigns, Calendars, and Holidays. (or calendar) to specify a list of holidays on which no messaging windows should be created. The calendar and its included holidays can be applied to individual campaigns within the current client. By default, calling windows are not created on designated holidays and for the configured number of days before or after. However, holiday hours can be used to permit calling windows during specific hours of a holiday.
Controls are containers for a group of related, reusable settings that govern service-level operations. Controls include Campaigns, Calendars, and Holidays. (or calendar) to specify a list of holidays on which no messaging windows should be created. The calendar and its included holidays can be applied to individual campaigns within the current client. By default, calling windows are not created on designated holidays and for the configured number of days before or after. However, holiday hours can be used to permit calling windows during specific hours of a holiday.
There are two types of calendars: system and client. System calendars are created and maintained by Nuance and are visible to all clients. In contrast, client calendars are created and maintained by individual clients and are only visible to the client who created them. Currently, the only system calendar is System Holidays, which contains all holidays defined at the system level. You can view details about this calendar but you cannot make any changes to it.
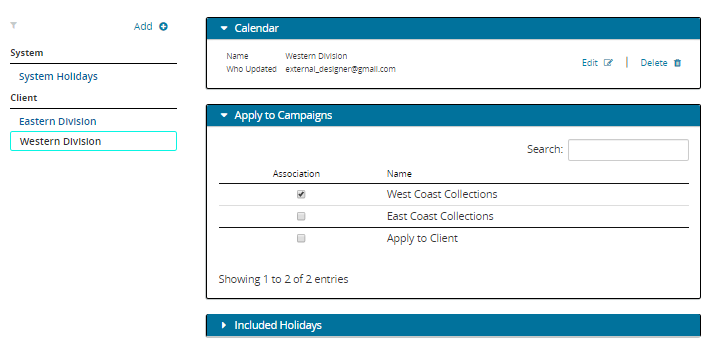
Here is an example of a client-created calendar called Western Division. It is applied to one campaign, called West Coast Collections.

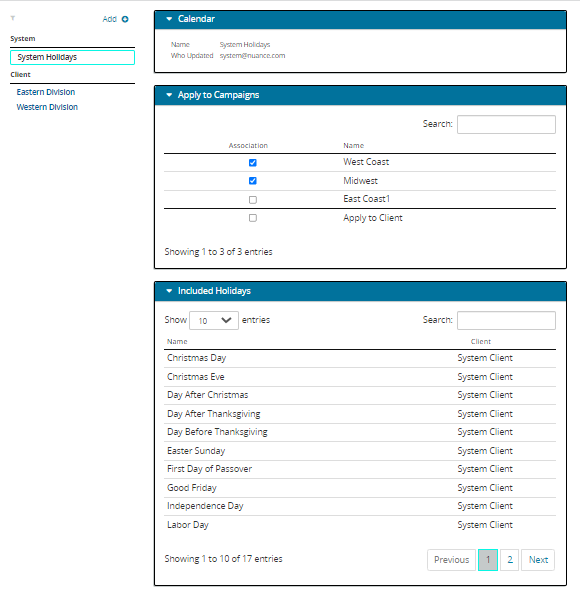
Here is the System Holiday calendar, which includes the standard US holidays. It is applied to two campaigns.

After you have created a calendar, you can use it in one of two ways: (1) at the client level, which applies the calendar to all campaigns in the current client, or (2) at the campaign level, meaning you manually select each campaign that the calendar should be applied to. When the Dispatch Service creates a schedule at runtime, it factors in calendars applied to the client and all campaign fields in the record being processed. If you want all your campaigns to follow the same holidays, we recommend creating a single calendar and using Apply to Client to apply it to all campaigns in the client. For details see:
Adding a client calendar
Use the following procedure to create a client calendar. Note that you cannot create a system calendar.
When you first create a calendar, it will have no holidays included in it. To add holidays, see Adding holidays to a client calendar.
- From the header bar, select CONTROLS.
- Select Calendars in the left nav bar. Click Add. The New Calandar dialog opens.
- Enter a unique Id and Name.
- By default, the new campaign is applied to the current client. If you don't want this, clear the Apply to current client check box.
- Click SAVE.
Changing the name of a client calendar
This is for client calendars only. Note that you cannot make any changes to a system calendar.
- From the header bar, select CONTROLS.
- Select Calendars in the left nav bar.
- Click the name of the calendar to edit.
- In the Calendar panel click Edit. The Edit Calendar dialog is displayed.
- Enter the new name. You cannot edit the Id. Click SAVE.
Applying the calendar to all campaigns
- In the top menu bar, click CONTROLS.
- Select Calendars in the left nav bar.
- Click the name of the calendar you want to apply.
- Click Apply to campaigns.
- Select the checkbox for Apply to Client. A calendar is used for a record if it is applied to that record's client or campaign.
Applying a calendar to individual campaigns
- In the header bar, click CONTROLS.
- Select Calendars in the left nav bar.
- Click the name of the calendar you want to apply.
- Click Apply to campaigns. A list of available campaigns is displayed. Select the check box for each campaign you want use with this calendar. Clear all the other check boxes.
Adding holidays to a client calendar
This is for client calendars only. Note that you cannot make any changes to a system calendar.
- In the header bar, click CONTROLS.
- Select Calendars in the left nav bar. Click the name of the calendar to edit.
- Click Included Holidays. A list of available holidays is displayed. Select the check box for each holiday you want to include with this calendar. Clear all the other check boxes.
