Managing the DNC list
The Do Not Contact list (DNC list) is a client-specific list that contains media addresses that should not receive messages. Each entry in the list specifies a media address (phone number or email address) and a delivery type (voice, SMS, or email). Using the DNC query interface, users can view, add, and remove media addresses from the DNC list. For most applications, the platform will not dispatch calls or messages to media addresses on the DNC list.
A DNC entry is always in the context of a delivery type, such as SMS, voice, or email. These delivery type entries are completely independent from one another, so you need to set up one for each channel you need. When you remove an entry, you also remove any verification and consent that exists for this channel for the address. If you add it back, consent and verification will need to be requested again through normal messaging channels.
You must perform operations on each media address individually. The manager does not support bulk operations on addresses.
Opening the DNC query interface
- In the header bar click ADMINISTRATION:
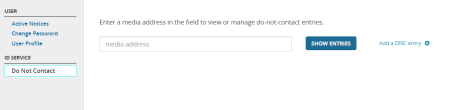
- In the left navigation bar, click Do Not Contact.
- You should see the DNC query interface:

Viewing DNC entries for a media address
- Open the DNC query interface, as described in Opening the DNC query interface.
- In the Media address box, enter the media address you want to view entries for. For example, 2065551212 or sample.user@nuance.com.
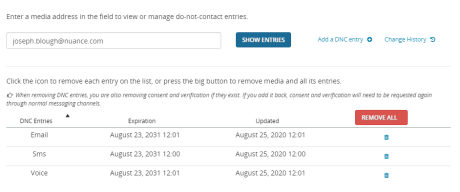
- Click the SHOW ENTRIES button. The DNC entries for that address are displayed. If no entries exist, you will see No data available in table. In the following example, the email address has three DNC entries associated with it:
Adding a DNC entry for a media address
- Open the DNC query interface, as described in Opening the DNC query interface.
- In the Media Address box, enter the media address you want to view entries for. For example, 2065551212 or sample.user@nuance.com.
- Click the SHOW ENTRIES button. The DNC entries for that address are displayed. If no entries exist, you will see No data available in table.
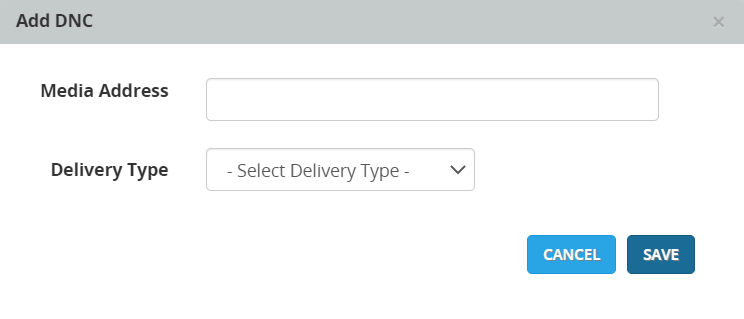
- Click Add a DNC entry. This displays the Add DNC dialog:

- For Delivery Type, select an option from the dropdown. This can be Voice, Sms, or Email.
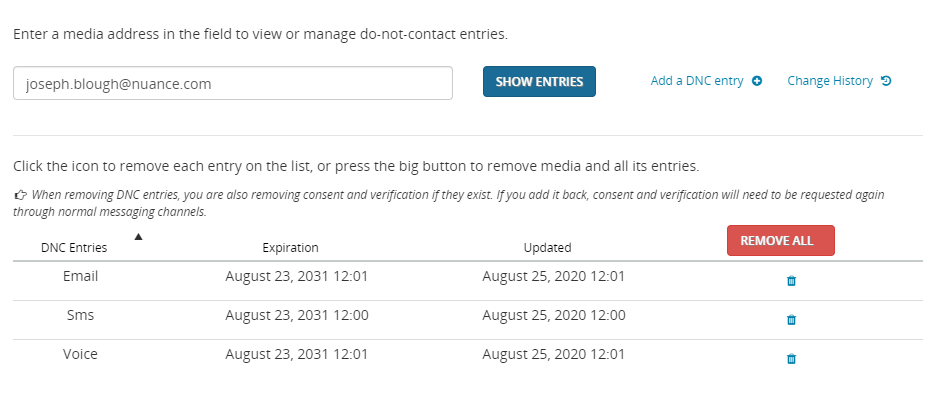
- Click SAVE. The new entry will be added to the DNC Entries column. This is an example for an email address:

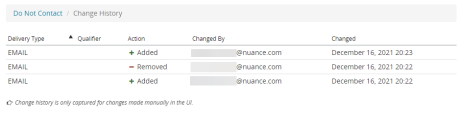
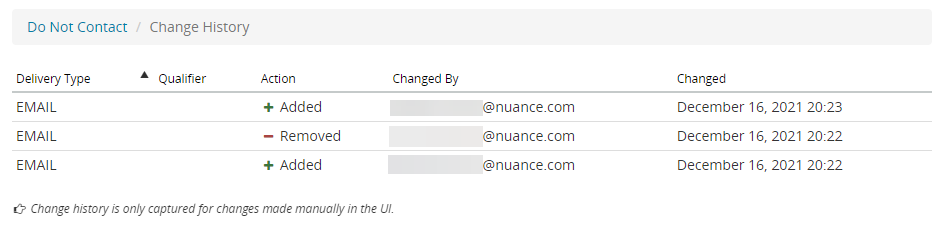
Viewing the change history for a media address
The change history captures changes made via the DNC query interface. Note that this history does not show changes made programmatically by the application.
- Open the DNC query interface, as described in Opening the DNC query interface.
- In the Media Address box, enter the media address you want to view. For example, 2065551212 or sample.user@nuance.com.
- Click the SHOW ENTRIES button. The DNC entries for that address are displayed.
- Click the Change History button. You will see the change history for that media address. This is an example:
- To return to the main screen for DNC List Manager, click Do Not Contact.
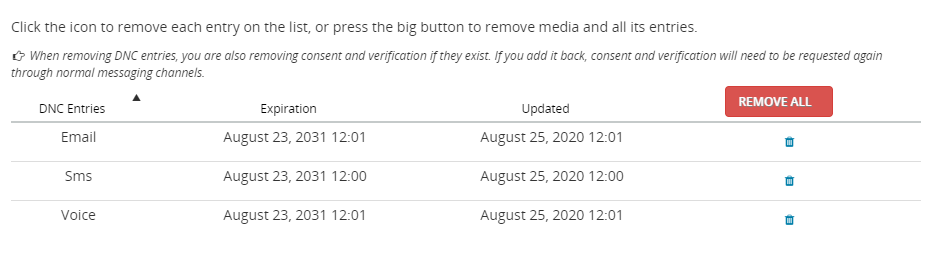
Removing DNC entries for a media address
When you remove an entry, you also remove any verification and consent that exists for this delivery type for the address. If you add it back, consent and verification will need to be requested again through normal messaging channels.
To remove DNC entries:
- Open the DNC query interface, as described in Opening the DNC query interface.
- In the Media Address box, enter the media address you want to view. For example, 2065551212 or sample.user@nuance.com.
- Click the SHOW ENTRIES button. The DNC entries for that address are displayed.
- In the DNC Entries list, find the entry you want to delete and click the Remove button (
 ). Alternatively, click REMOVE ALL to remove all entries for this address.
 - A confirmation dialog is displayed. Click OK. The entry is now removed from the list.
