Using realtime throttles
Use realtime throttle controls (or throttles) to monitor and adjust the dispatch rate of transfers to client call centers.
Realtime throttles are designed to manage capacity constraints in projects that have transfers to agents or IVRs. To gauge the status of the call center, each throttle has a setting called Call Center Metric. For each type of metric, configurable parameters specify the highest acceptable, optimal, and lowest acceptable values of the metric. Every 60 seconds, the platform determines the current value of the metric and then adjusts the dispatch rate to bring it closer to the optimal value. This is similar to the way the cruise control system in a car monitors the car's speed and adjusts the throttle to provide more power when the speed is below the target value, and less when it is above.
For example, suppose you have a project that warns consumers about unusual or high-dollar credit card transactions and offers the option to speak with an agent. If you want an average hold time of 60 seconds, set Control Mid to 60 seconds. The dispatch rate will automatically adjust to try to keep the average hold time at that level. Note that the platform only receives data about call center hold times from calls that it places and is not aware of volumes or hold times for other calls coming into the call center.
Clients don't have the ability to create or delete throttles, or set the increments by which pacing will adjust when stepping up or down. In most cases, Nuance will create and configure throttles for the client in accordance with the client's requirements. Only authorized client users can view and edit throttle settings.
Editing a throttle
Only client users with the Designer role can view and edit throttle settings.
- From the header bar, click CONTROLS.
- From the left menu bar, click Realtime Throttles, which appears under PACING. This displays a list of realtime throttles.
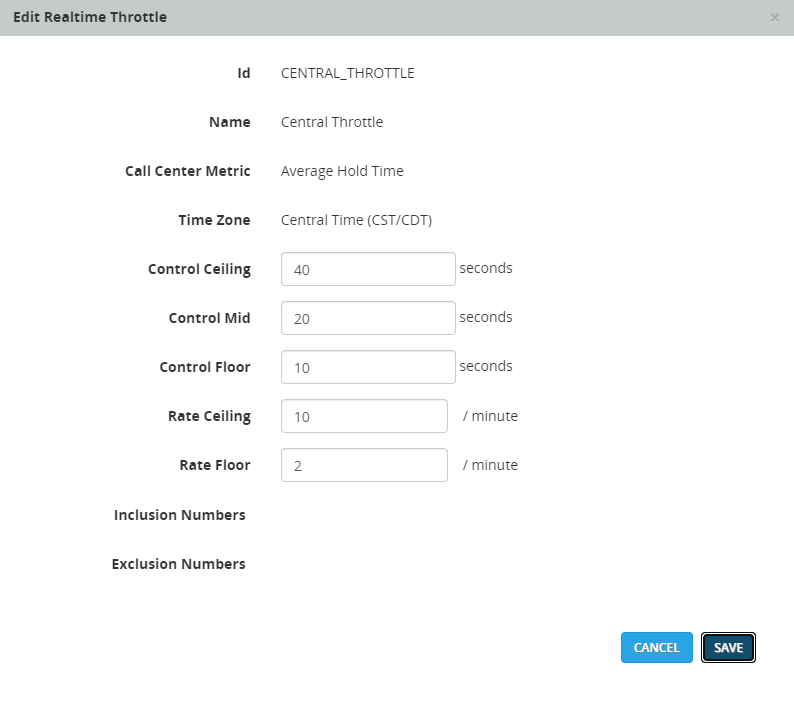
- Find the throttle you want to edit and click Edit to display the Edit Realtime Throttle dialog. Here's an example:

- Make settings as described in the tables below. Note that you cannot change the Call Center Metric and Time Zone settings.
Call center settings
These settings to specify the call center metric and time zone. Only Nuance can change these settings.
Control boundary settings
Use the these settings to specify the boundaries of the call center metric. Units depend on the Call Center Metric selected above. Average Hold Time and Max Hold Time are measured in seconds. Transfer Count is measured by number of transfers. The following image shows an example shows a throttle with Average Hold Time selected as the metric and the unit in seconds.
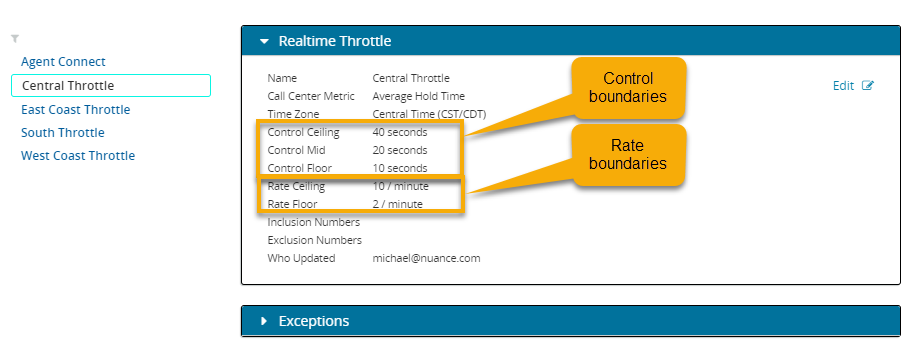
Rate boundary settings
Rate boundary settings specify the absolute minimum and maximum values for the dispatch rate.
Control boundaries example
Platform dispatching adjustment occurs proportionally. If the current value is marginally lower than the Control Mid value, the rate increases only a small amount. If the current value is just above the Control Floor value, the rate increases by a larger amount.
The same applies to decreasing the dispatch rate when the current metric is between the Control Mid and Control Ceiling values.
To understand the calculation, consider a project type using an Average Hold Time throttle with the following configured control boundaries:
| Throttle Settings | Value |
|---|---|
| Control Ceiling |
90 seconds |
| Control Mid | 60 seconds |
| Control Floor | 30 seconds |
| Increase Settings | 25 percent |
- The current average hold time is 50 seconds.
- The range from Control Mid to Control Floor is 30 seconds.
- The current rate is less than the Control Mid value by 10 seconds, or 33.3 percent of the range.
Therefore, in this example, the platform increases the dispatch rate by 33.3 percent of the Increase Settings value, or 8.3 percent.
Adding throttle exceptions
You can override the settings of a realtime throttle for specific hours or days of the week. This is called an exception. The exception time zone is taken from the parent realtime throttle, and is used as the time zone for the time fields given. The rate calculation specified in the exception is used in the prescribed time window, rather than the settings in the parent throttle. You can edit throttles and exceptions as needed.
- In the left menu, select a throttle.
- Click the arrow to open the Exceptions panel.
- Click Add Exception. The New Exception dialog displays. Enter values for each field and click SAVE. For information about the properties, refer to the tables in Editing a throttle.
