Tutorial—creating a network
This scenario gives you hands-on experience using the Network Design feature. You’ll create a network that runs two voice dialer applications for the fictional Acme Corporation. You’ll also use the Save Cluster Configuration feature to recreate part of the network. Here’s the network that you’ll create:
This structure contains these clusters:
- The Acme and VoiceDialer clusters are grouping clusters. They create a multilevel network.
- The Rack clusters contain hosts in a distributed configuration.
- The AppServers are shared-resources clusters. They contain a pool of application server hosts accessed by the hosts in the Rack clusters.
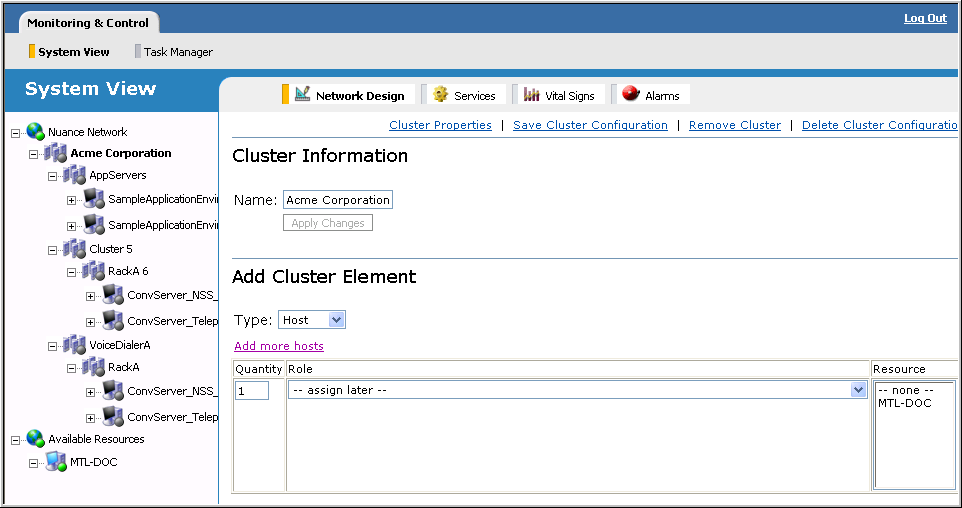
Add clusters
Add your clusters and create the desired hierarchy.
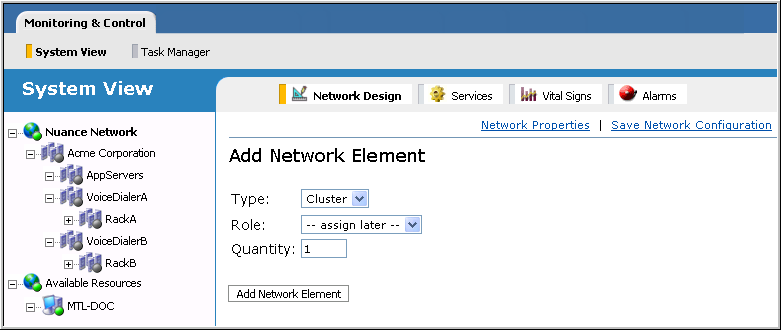
- Click Network Design from the toolbar to display the Add Network Element page.
- Click Nuance Network and add one cluster. Cluster 1 appears in the network view.
- Select Cluster 1 to display its Cluster Information page. Change the name to Acme Corporation. Apply the changes. This cluster represents the top-level grouping cluster. All other clusters belong to this cluster.
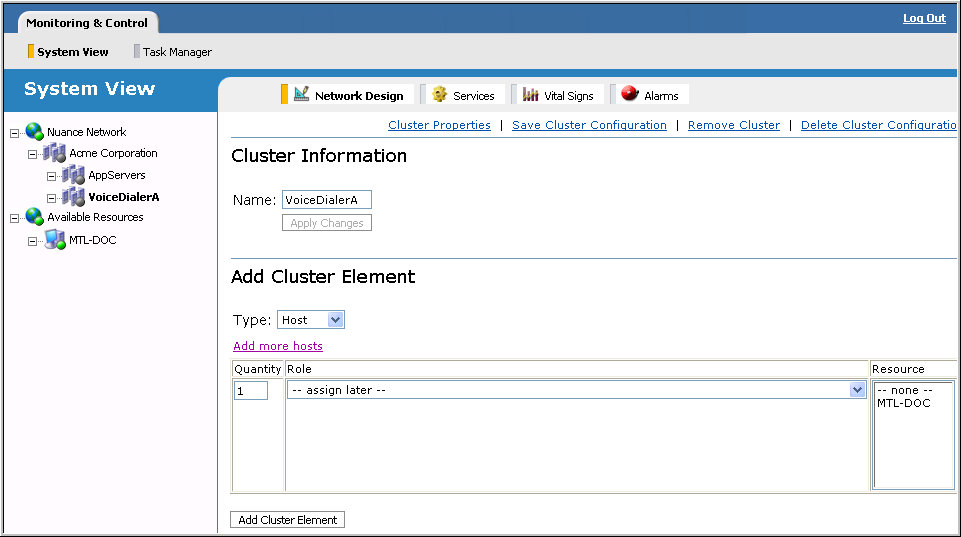
- The next level in the hierarchy contains two clusters. (In reality, it contains three but we’re going to use the Save Cluster Configuration to save us a lot of work.) To add these:
- Select the Acme Corporation cluster from the network view.
- In the Add Cluster Element region, change Type to Cluster and Quantity to 2.
- Click Add Cluster Element. The clusters are added to the network under Acme Corporation. For example:

- Select the clusters one at a time and rename them to:
- AppServers
- VoiceDialerA
(Make sure to click Apply Changes after renaming a cluster.)
When finished, your network looks like this:
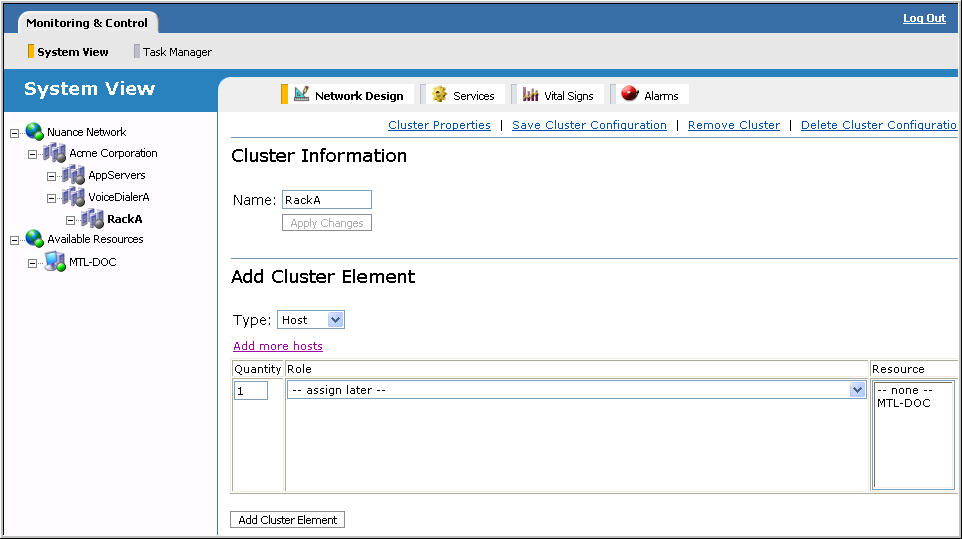
- To add VoiceDialerA, which is also a grouping cluster since it contains a child cluster:
- Select VoiceDialerA and add one cluster.
- Rename it to RackA.
When finished, your network looks like this:
Add hosts
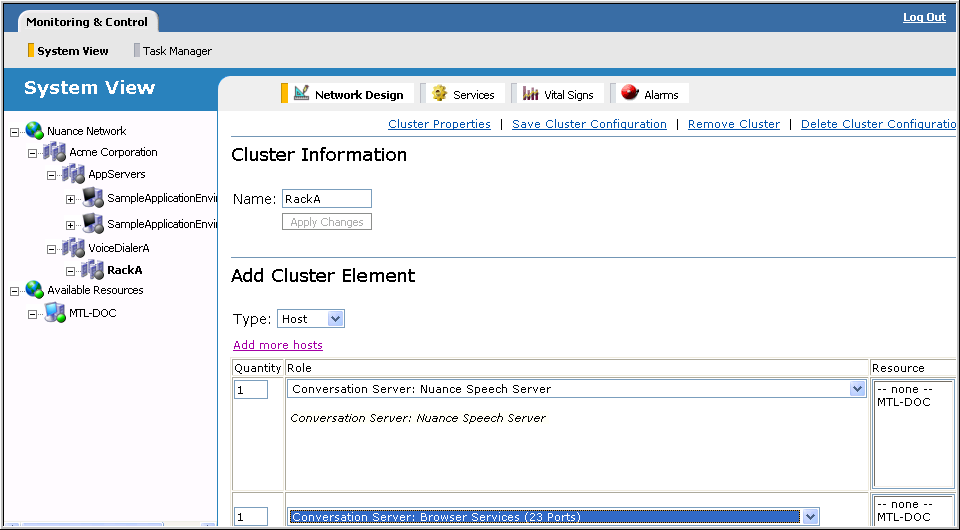
Now that you’ve added clusters in the correct hierarchy, it’s time to add the host elements to the appropriate clusters. Add the shared-resources hosts first:
- Select the AppServers cluster and add two hosts, each configured with the application role. Since both hosts have the same role, enter 2 in the Quantity field and choose the role.
- Now add the hosts to the Rack clusters. Select RackA and add two hosts. Since each host has a different role, click the Add more hosts link one more time to arrive at a total of two. The Add more hosts link lets you configure multiple hosts with different roles before adding them to the network.
- Choose the appropriate roles. This example configures Speech Server and browser hosts (the available roles depend on your deployment).
The final network has a VoiceDialerB cluster with the same configuration as VoiceDialerA. To add this cluster, select VoiceDialerA in the left frame and click the Save Cluster Configuration link.
- Enter a name in the dialog box, for example, Voice Dialer Cluster Config, and click OK.
- Select Acme Corporation in the left frame, then choose Cluster for the type of cluster element to add.
- The new role you just created with Save Cluster Configuration appears in the role list. Choose it and click Add Cluster Element. The new cluster is added to the network. For example:
- Rename the new clusters to VoiceDialerB and RackB.
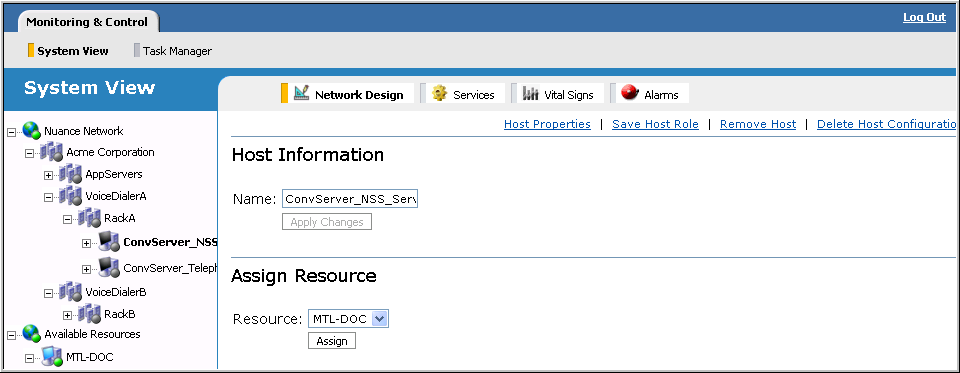
Assign physical hosts
Assign physical hosts to all host elements. This step is done last when it’s someone else’s responsibility or the physical hosts weren’t available when the network was created.
- Select a host. The Host Information page appears.
- Select a physical host from the Assign Resources region. For example:
Once a host is assigned, the name changes to the machine name and a green LED appears in the network view. The LED indicates the host is online. For example:
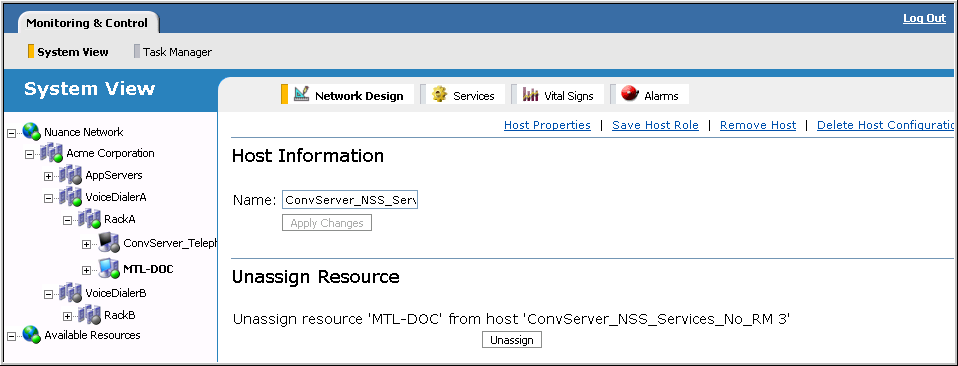
- Repeat for all hosts.
- Modify service properties on individual instances as needed.
