Using holiday controls
Use a Holiday control![]() Controls are containers for a group of related, reusable settings that govern service-level operations. Controls include Campaigns, Calendars, and Holidays. to specify a day when the platform should not allow messaging windows. Nuance has already defined many common holidays (these appear under System Holidays), but you are free to create your own as needed. Just creating a Holiday control has no effect on dispatching until you include it a calendar and the calendar is associated with a client or campaign. When Dispatch Service receives a record, it looks up all the Calendar controls associated with that record, either via client-level or campaign-level associations, and gathers all the Holidays on all those calendars. It creates a schedule for the record, factoring in all the Holidays. By default, no windows are allowed on Holidays included in those Calendars.
Controls are containers for a group of related, reusable settings that govern service-level operations. Controls include Campaigns, Calendars, and Holidays. to specify a day when the platform should not allow messaging windows. Nuance has already defined many common holidays (these appear under System Holidays), but you are free to create your own as needed. Just creating a Holiday control has no effect on dispatching until you include it a calendar and the calendar is associated with a client or campaign. When Dispatch Service receives a record, it looks up all the Calendar controls associated with that record, either via client-level or campaign-level associations, and gathers all the Holidays on all those calendars. It creates a schedule for the record, factoring in all the Holidays. By default, no windows are allowed on Holidays included in those Calendars.
As an example, suppose a Canadian client wants to block messaging on Boxing Day. The client would first create a Holiday control for Boxing Day and specify the date of the holiday. Then the client would add the Holiday for Boxing Day to a Calendar control and apply the Calendar to an individual campaign or the entire client.
By default a Holiday specifies one day in a specific year. It has no effect after that day has passed and you would need to create a new holiday to block messaging on that day in subsequent years. This can be inconvenient because in most cases you want holidays to be in effect every year. If you want a Holiday control to be in effect every year on the same date, such as January 1st for New Year's Day, you can set the holiday to recur every year by selecting the Perpetual Date check box. If the holiday does not fall on the same date every year, as is the case with Thanksgiving Day or Easter, you can specify the dates the Holiday control should be in effect in future years. Do this by clicking Add Future Date for the future year and specifying the date for that year. You can specify up to 10 future dates. When the date has passed, Dispatch service replaces the passed date with the next future date. Future Dates and Perpetual Date settings are optional.
Note that by default, a Holiday blocks calling for all 24 hours of the holiday. If you need finer-grained control, you can restrict dispatching to certain hours within a holiday by adding a Holiday hour control. You can also restrict calling on the day before and after the Holiday. For details, see Using holiday hours. For general information about how Hours and windows work, see Understanding hours and windows.
Adding a Holiday
To add a Holiday:
- From the header bar, select CONTROLS.
- Select Holidays from the left navigation bar.
- Click Add.
- Enter an ID and name.
- By default the Holiday applies to all countries. If you want the Holiday to apply only to a specific country, select a value for Country. The default value is All.
- By default the Holiday applies to all states or provinces in a country. If you want the Holiday to apply only to a specific state or province, select a value for State. The default value is All.
- Select a date for the Holiday. You cannot select a date in the past.
- If you want the Holiday to be in effect on the same day every year, select Perpetual Date.
- If you want to specify the day the Holiday should be in effect in one or more future years, clear Perpetual Date and click Add Future Date. Then click the date picker to specify the year and day.
- Click SAVE.
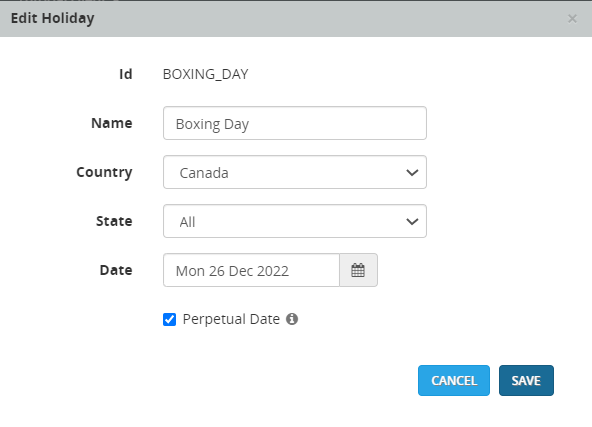
This is an example of a Holiday that defines 'Boxing Day' as December 26, 2021. It is set as a Perpetual Date so it will be in effect on December 26 of each year.
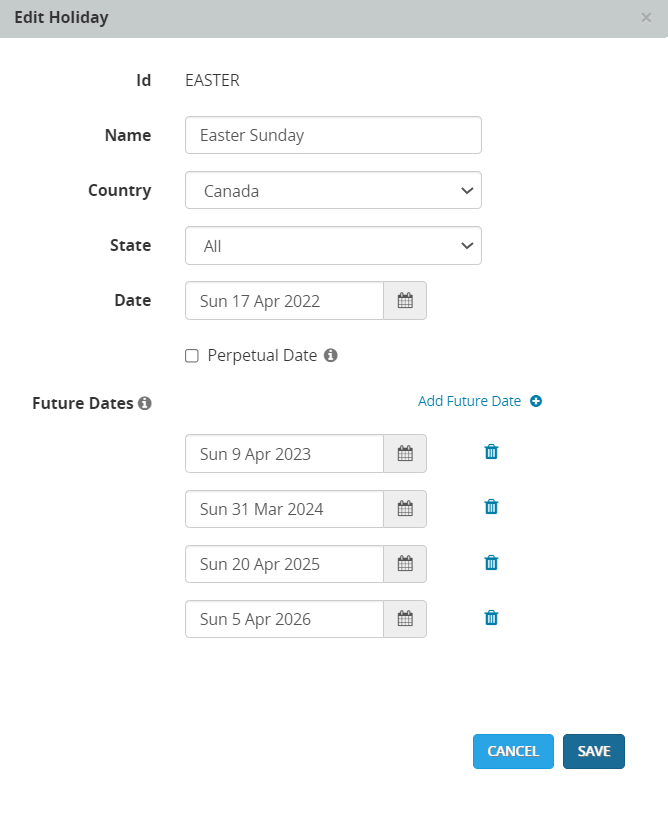
This is an example of a Holiday that defines 'Easter Sunday' for the next 5 years using Future Dates.
Including a Holiday in a Calendar
To include a Holiday in a Calendar:
- From the header bar, select CONTROLS.
- Select Holidays from the left navigation bar.
- Select the name of the holiday.
- Click Add to Calendars.
- A list of available calendars is displayed. Select the check box for each calendar you want to include this holiday in. Clear all other check boxes.
Configuring additional Holiday settings
For most users, the default holiday settings are sufficient. However, you can configure additional holiday settings beyond the default. These settings are called holiday handling. You can specify the following settings:
- whether to suspend dispatches for any number of days before and after the holiday
- whether to use a holiday hours control
- whether to extend record expiration if the expiration falls during a configured holiday period
You may specify holiday handling at three levels: client, calendar, and campaign. Client-level handling is sufficient for most situations, but if you need specific handling for certain campaigns, you may specify holiday handling at campaign or calendar level. The lowest level of holiday handling takes precedence. The order is: client (highest), calendar (next highest), and campaign (lowest).
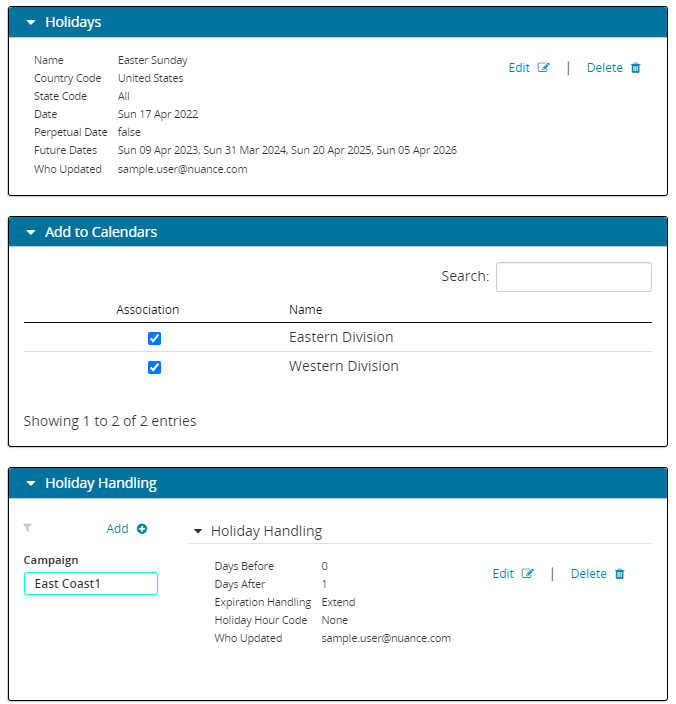
Here's an example of a Holiday with campaign-level handling that is in effect 1 day after the specified date.
Before setting holiday handling, you must first add the Holiday to a Calendar. For details see Including a Holiday in a Calendar.
To use holiday handling:
- From the header bar, select CONTROLS.
- Select Holidays from the left navigation bar.
- Click the name of a Holiday to display its details, then click Holiday Handling.
- Do one of the following:
- Enter your changes in the Holiday Handling dialog. See the table below for descriptions.

- Click SAVE.

