Using hours versions and hour codes
Hour codes specify the hours during which phone calls and email messages are allowed. There are two types of hour codes: Consumer (recipient) hours and Call Center hours, Consumer hours specify when consumers can be contacted and are evaluated relative to the consumer’s time zone. Typically multiple calling windows are defined for consumer hours. Call Center hours define when the client's call center is open, and are typically used for applications that contact consumers by voice and transfer them to a call center. Call Center hours are evaluated relative to a fixed time zone, typically the location of the call center.
For details about hour codes, see Understanding hours and windows.
An hours version is a collection of hour codes that can be managed as a single unit. Hours versions enable testing of new project versions that may involve changes to hours without affecting the production traffic. Client users can see hours versions but they cannot create or modify them. Typically, Nuance manages hours versions and there is no need to modify them.
The hours version control has the following panels:
- Version, for setting and displaying the name of the hours version.
- Hour Codes, for specifying Consumer and Call Center hour codes (calling windows and time zones).
Only Nuance internal users have the ability to create hours versions or apply them to project versions.
Adding an hour code to an hours version
- From the header bar, click CONTROLS.
- From the left navigation bar, click Hours Versions.
- Click an hours version to edit. Be sure to select the hours version for the project you're working on under the PROJECTS tab. (Look for the Hours Version under the project name.) For details, see Open a project for editing (MOD projects only).

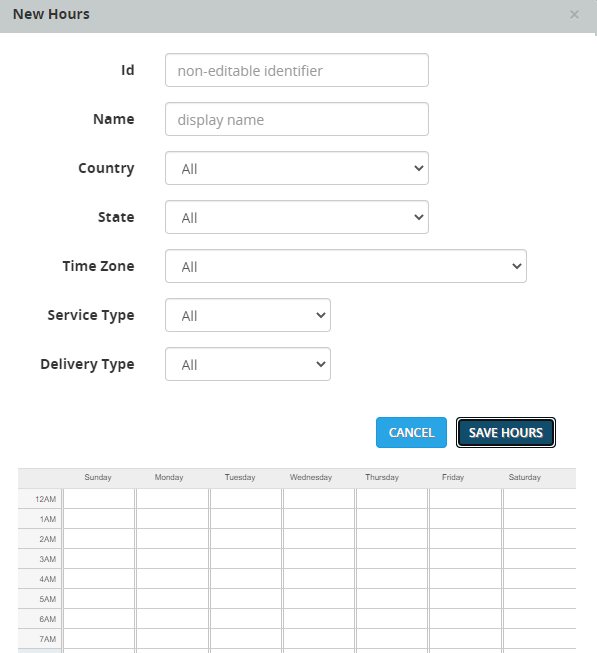
- Expand the Hour Codes panel and click Add. The New Hour Code dialog is displayed.
- Enter a name and Id.
- Select a Type (Callcenter or Consumer) and then enter values for the fields. If you selected, Callcenter, you must specify a value for Call Center Timezone. For details, see the Understanding the settings used in the Hour Code dialog below.
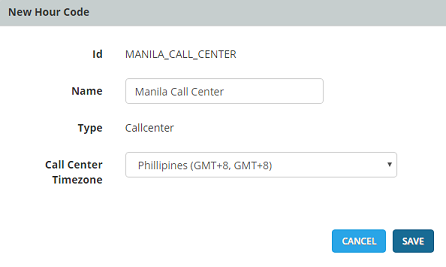
- After you have entered the information, click SAVE.
- If you want to add additional hour codes, go back to Step 4.
Editing an hour code
- From the header bar, click CONTROLS.
- From the left navigation bar, click Hours Versions.
- Click the hours version containing the hour code you want to edit. This displays the hour codes defined for that version.
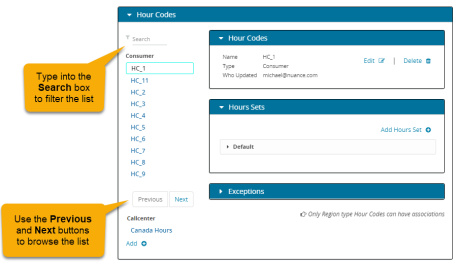
- In the Hour Codes panel, click the name of the hour code you want to edit. Depending on its type, the code may appear under Callcenter or Consumer. If the list of codes is long, type the name of the code into the search box to filter the list. Alternatively, you can browse the list using the Previous and Next buttons.
- Make your changes to the hour code, then save your changes.

Understanding the settings used in the Hour Code dialog
This table describes the settings that appear in the Hour Code dialog. The hour code types are Callcenter and Consumer and each type uses different criteria to determine the time zone for the purposes of dispatching. For call centers, the platform uses the time zone specified in the hours code. For consumers, the platform attempts to determine each consumer's time zone based on the project type and geographic information in the record.
| Setting | Description |
|---|---|
| Type |
|
| Call Center Timezone |
The time zone for the call center. |
Setting hours for the default hours set
Each hour code has a default hours set, which specifies the permitted calling (or messaging) hours for each day of the week. It is important to specify the calling hours for the default hours set before you assign it to a campaign. If you don't, the hour code will block messaging 24 hours a day, every day of the week.
For details about hours sets, see Using hours sets.
- From the header bar, click CONTROLS.
- From the left navigation bar, click Hours Versions.
- Click an hours version to edit.
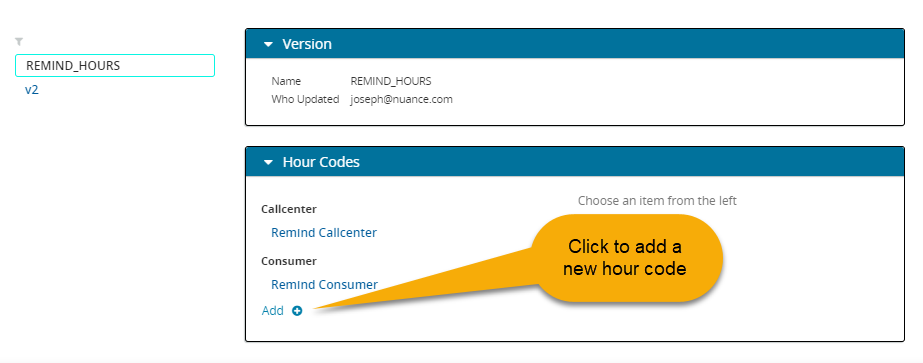
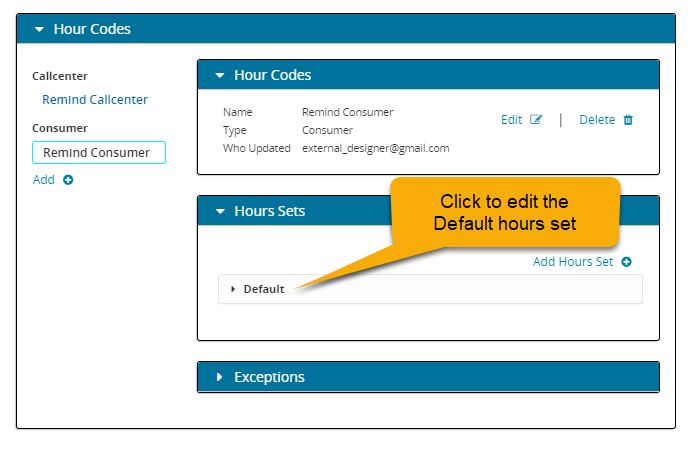
- Click the Hour Codes panel, then click the hour code you want to edit. The details will display. This image shows details for the Remind Consumer hour code:

- In the Hours Sets panel, click Default. This displays details about the default hours set.
-
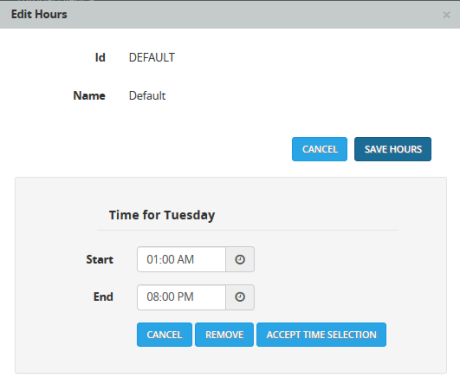
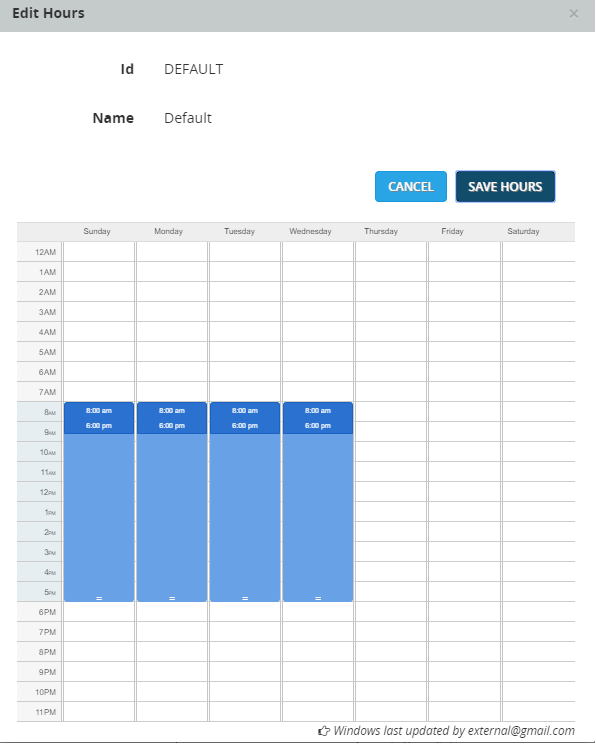
Click Edit to display the Edit Hours dialog. This is where you define the default messaging hours for each day of the week.

-
Click and drag the mouse to select hours and days in the schedule when you want to permit messaging. After each selection click ACCEPT TIME SELECTION.
-
When you have finished specifying hours, click SAVE HOURS.

Adding additional hours sets to Consumer hour codes
Occasionally you may need to set up windows that differ slightly based on dispatch record criteria, such as time zone, state code or delivery type (channel). For example, if you want SMS dispatches to use the same Consumer hour code as Voice dispatches, but have different windows, you could define an additional hours set for that.
Consumer hour codes can have any number of hours sets, in addition to the default hours set. Call Center hour codes only have the default hours set. The following procedure can be performed on Consumer hour codes only.
- From the header bar, click CONTROLS.
- From the left navigation bar, click Hours Versions.
- Click an hours version to edit.
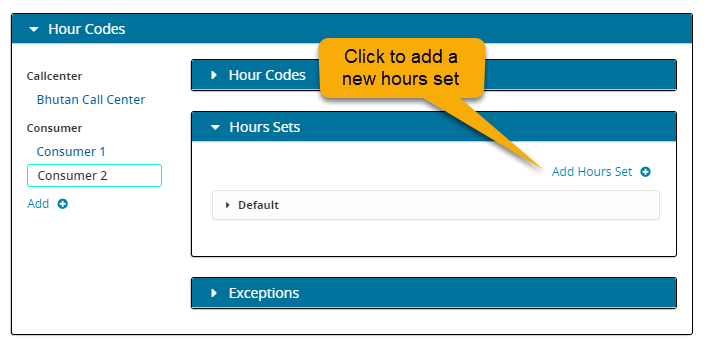
- Click the Hour Codes panel, then click the hour code you want. The details will display. This image shows details for the Consumer 2 hour code:

-
In the Hours panel, click Add Hours Set. The New Hours dialog is displayed.
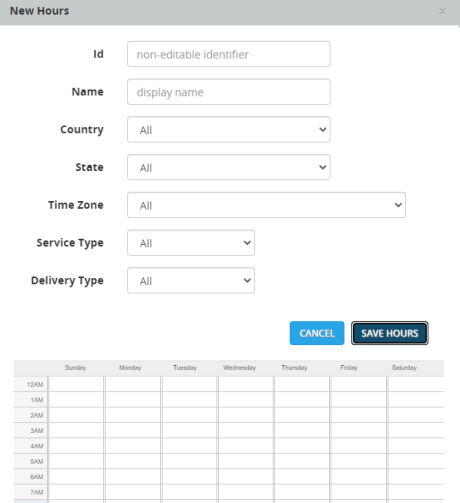
-
Enter values for each field in the dialog. For details about these fields, see Understanding the settings used in the Hours Set dialog.
-
Click and drag the mouse to select hours and days in the schedule when you want to permit messaging. After each selection click ACCEPT TIME SELECTION.
-
When you have finished specifying hours, click SAVE HOURS.
Understanding the settings used in the Hours Set dialog
This table describes the settings that appear in the Hours Set dialog for a Consumer hour code. The Name field is required. In addition, at least one other field must be specified. The hours set will be applied to records having fields that match all the values you specify in the dialog.
Setting exceptions for an hour code
Hour code exceptions give you the ability to override Consumer and Call Center hours for a specified date. This override feature is similar to holiday hours, but unlike holiday hours, hour code exceptions are not tied to a specific calendar and campaign. Use hour code exceptions to specify overrides to an hour code for a specific day and year. An hour code exception defines only one window per day and when in effect, it will limit dispatching to that one window. It takes precedence over any holiday hour code defined for that day. All of the other standard rules for computing the span of messaging windows still apply, and the exception is included as part of the computation. The exception is specific to the specified date and year and does not recur in subsequent years.
This is an advanced feature and shouldn't be needed by most clients, for whom holiday hours should suffice.
- From the header bar, click CONTROLS.
- From the left navigation bar, click Hours Versions.
- Click the hours version containing the hour code you want to edit.
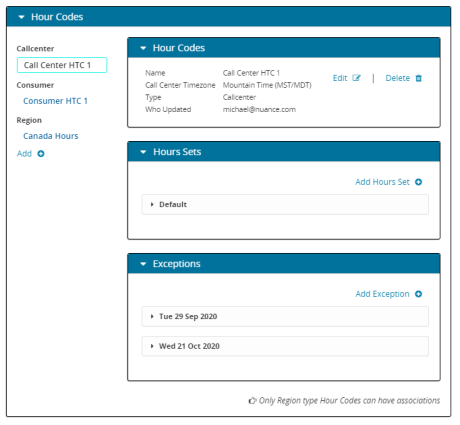
- Click the Hour Codes panel, then click the hour code you want to edit. The details will display. This example shows details for the Call Center HTC 1 hour code. There are panels for Hour Codes, Hours, and Exceptions:
- In the Exceptions panel, click Add Exception. This displays the Add Exception dialog:
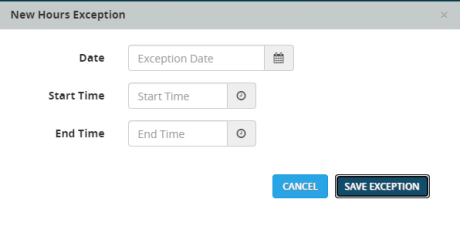
- For Date, select the year and date that exception should be in effect. An exception is in effect for the specified date in the specified year. It does not repeat in subsequent years.
- Enter the Start Time and End Time that the exception will be in effect.
- Click SAVE EXCEPTION.


