Manage audio files
Message Editor gives you the ability to upload your own audio files and use them in messages to consumers. You also can use the shared audio files managed by Nuance and made available to all clients.
Note: You can create and modify message content in MOD projects only. In standard projects, Nuance creates the message content according to the requirements of the client. To make changes to standard projects, contact your Nuance representative.
Supported audio formats
The Proactive Engagement Platform / supports .wav audio files with the following encodings:
-
8 bit, 8 KHz, A-law encoding, single channel
-
16 bit, 8 KHz, linear encoding, single channel
The rate used must match the rate of the current session (8 KHz).
Edit and delete existing audio files
- Open Message Editor and click an audio element (
 ) to display the Audio dialog:
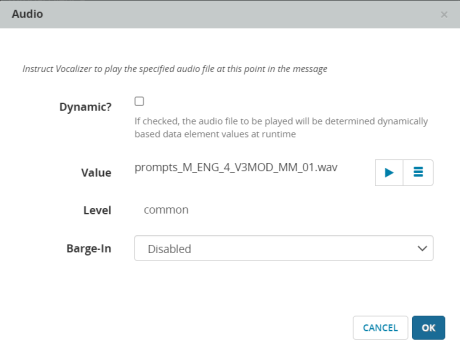
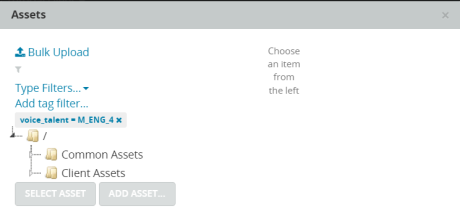
- Click the hamburger button (
 ).
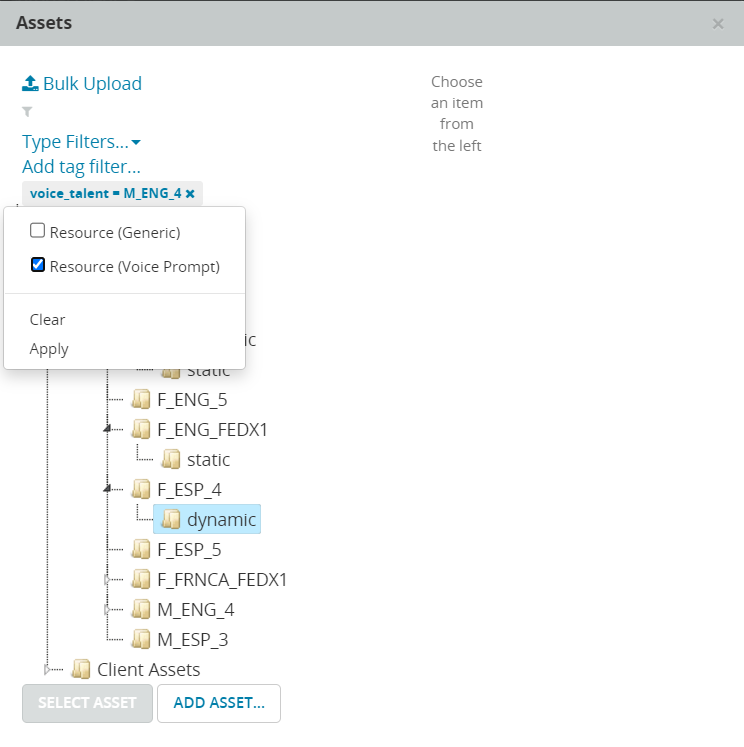
). - You should see the Assets dialog. The Assets dialog is where you manage audio files. It has folders for Common Assets and Client Assets. The Common Assets folder contains shared audio files that any Nuance client can use. To view audio files specific to your client, click Client Assets. Expand the tree as needed and click a folder to display the files in it. If you don't see the file you're looking for, make sure there are no filters applied to the view.
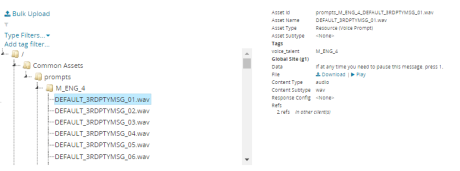
- Click the filename of an audio file to display details for it. You can click Play to listen to the prompt or click Download to download it. The Refs field shows any project versions that reference this asset.
- To filter the list by filename, click the funnel icon (above Type Filters), enter a string into the field, and click ENTER. Filenames that contain the string remain displayed, and all others are hidden.
- To filter the list by file type, click Type Filters and from the dialog, select the type of assets to filter. Then click Apply. To remove the filters, click Clear. Type filters are only available for certain asset types. In the following example, the list has been filtered to display only voice prompts.
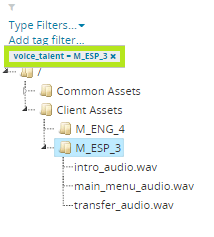
- To filter the list by tag, click Add tag filter, then select a tag and enter a value. To remove the filter, click x. Not all asset types have tags defined.
-
To edit an audio file, select it from the tree and right-click. From the context menu, select Edit Asset.
Make your changes and then click OK.
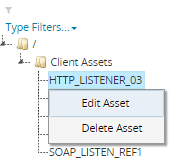
- To delete an audio file, select Delete Asset. You can delete assets in the Client Assets folder only. Assets in the Common Assets folder are read-only. If an audio file is used in any project version, you cannot delete the file.


Upload an audio file
From the Message Editor you can upload audio files and use them in your messages. Audio files must be uploaded to the Client Assets folder and must be in the .wav format.
- Open the Message Editor and click an audio element (an element with theicon) to display the Audio dialog:
-
Click the hamburger button (
). - You should see the Assets dialog. Click the Client Assets folder to display the file tree. (You cannot add assets to the Common Assets folder.)
- Select a location in the tree for the new audio file and then click Add Asset. This displays the Add Resource (Voice Prompt) dialog.
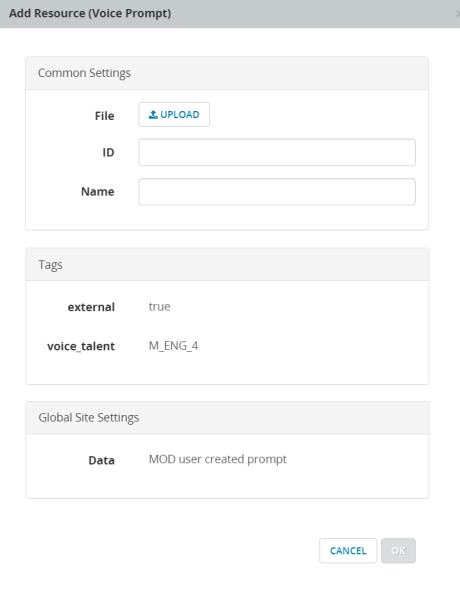
- Click Upload and browse to the audio file on your local machine. The file must have the .wav file name extension.
- Enter values for Name and ID. The ID must also have the .wav file name extension.
- Click OK. You should see the new audio file in the file tree.

