Data filters
There are two ways to filter data in the Filter area of the Query Design pane.
When selecting an existing filter in the Filter area of the Query Design pane, click Exclude to remove, but not delete, the filter from the report.
When selecting a previously excluded filter from a report in the Filter area of the Query Design pane, click Include to restore the filter in the report.
Simple Data filters
Access Simple filtering from the Home tab and from the Field tab.
The simple filter dialog allows you to create or modify WHERE statements. (WHERE statements enable you to select only the data that you want and to exclude all unwanted data.)
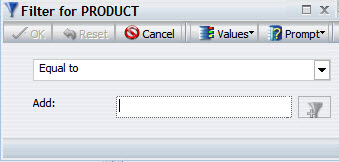
Selecting any Prompt option changes the purpose of the dialog to Creating an Auto-prompt parameter that you can select when you run a report.
| Values drop-down menu options |
|---|
| Prompt drop-down menu options |
|---|
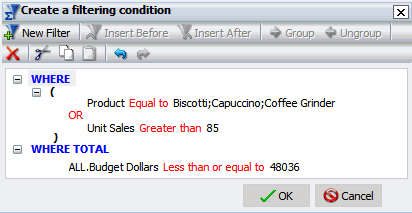
Advanced Data filters
Advanced Filter options include the ability to use WHERE and WHERE TOTAL, in addition to enabling AND, as well as OR, conjunctions in a single expression. You can also group conditions, expressions, and apply functions or calculations within criteria. (This option provides more functionality than the Simple Filter. )
WHERE and WHERE TOTAL Filters
You can change between WHERE and WHERE TOTAL by double-clicking WHERE.
- Use WHERE to select data that is based on individual column values.
- Use WHERE TOTAL to select data after it has been sorted and aggregated.
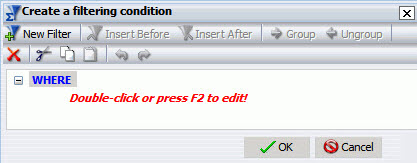
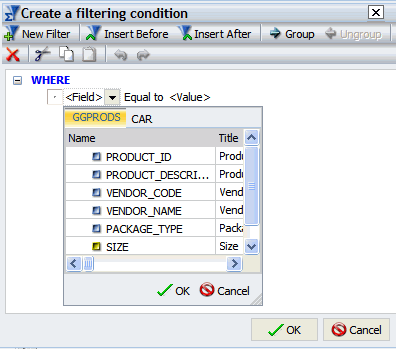
Double-clicking the "Double-click or press F2 to edit!" text opens drop-down menus for Fields, Operators, and Values. You can retrieve fields and values from your Master File and data source.
Field - drop-down menu provides a field list from the Master File.
|
Equal to - the default selection. Its drop-down menu offers a variety of OPERATOR choices: |
|
|---|---|
|
|
Notes on using Query Field types
| alphanumeric fields | |
| numeric fields |
|
| date fields |
Type - drop-down menu contains the following options.
- Constant - Enter a literal constant value.
- Parameter - Specify a parameter by entering a name and description in the text input areas and select the type of parameter (Simple, Static, Dynamic).
- Field - Enter a field name to compare against.
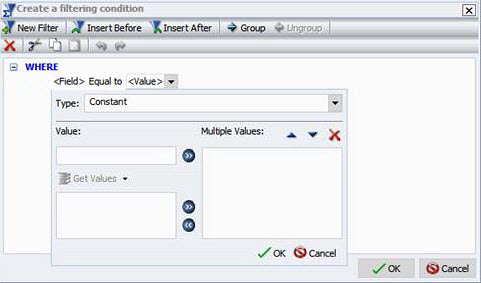
Value - this is a contains a text input box where you can manually insert values. It also contains a Get Values drop-down menu:
- All - Retrieves all values from the selected field.
- First - Retrieves the first value from the selected field.
- Last - Retrieves the last value from the selected field.
- Minimum - Retrieves the minimum value from the selected field.
- Maximum - Retrieves the maximum value from the selected field.
- From File - (not currently available)
Tip: The Get Values drop-down menu is only accessible if you have already selected a field.
Only use Get Values - All when querying a small to medium data set.
After selecting desired values, move them into and out of the Multiple Values area with the left and right arrows.
- You can also change the value order and delete values with the up and down arrows and the delete icon (X).
After creating a condition, insert additional conditions before and after it by using the Insert Before and Insert After buttons at the top of the dialog.
- Use either And or Or conjunctions to link conditions
- Use the Group and Ungroup buttons to nest and organize conditions.
After creating the desired filters, press OK to save and apply.
- Access them later from the Filter pane of the Resources panel.