Component operations
In addition to the component called Main, Mix.dialog supports two types of components: intent components and generic components. An intent component is a special type of component meant to handle one specific intent. A generic component can be used in different parts of a dialog design, to perform common tasks (for example, authentication, call transfer, check account balance), including fulfilling multiple intents.
This topic describes basic operations you can perform to manipulate generic components and intent components in Mix.dialog.
Add a generic component
This section explains how to add a component that is not an intent component.
- Click the Add icon
 , next to Components.
 - Enter a unique name for the component (see Naming guidelines).
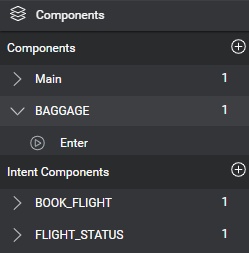
The new component appears in the Components section of the Components pane.
Rename a generic component
- On the Options menu, choose Rename component.
- Modify the name as desired (see Naming guidelines).
Add an intent component
This section explains how to add an intent component, and create the associated intent, as a single operation. Although Mix.dialog will automatically map a new intent component with an existing intent, if they have the same name, using the NLU resource panel to add the desired intent component might be preferable in such situations.
- Click the Add icon , next to Intent Components.
- Type a valid intent name for the intent component, and press Enter.
The new component appears in the Intent Components section of the Components pane.
The corresponding intent and its new mapping also appear in the NLU resource panel.
Convert an intent component into a generic component
- On the Options menu, choose Convert to component.
A message appears prompting you to confirm your intention—note that this action cannot be undone. - Click Confirm.
The component now appears in the (generic) Components section of the Components pane.
Delete a component
- On the Options menu, choose Delete component (or Delete intent component).
A message appears prompting you to confirm your intention. - Click Confirm.
Relink an intent component
Relinking an intent component to the intent it is meant to handle ensures that their name is kept in sync: for example, if the intent name changes after you created the intent component, the intent component will be renamed accordingly. It also allows you to quickly identify if the intent meant to be handled by the intent component has been deleted from the NLU model: in such a case, a broken link icon ![]() marks the intent component, in the Components pane. If an intent component with a broken link icon was actually not meant to handle a specific intent, you should convert it into a generic component.
marks the intent component, in the Components pane. If an intent component with a broken link icon was actually not meant to handle a specific intent, you should convert it into a generic component.
- On the Options menu, point to Link to existing intent.
The list of all intents that are not currently linked to an intent component appears. - Use the search field to narrow down the list, if needed.
- If the intent you would like to use is not in the list, type the desired name in the search field, and click the Add icon , to create the intent on the fly.
- Choose the desired intent.
(If the intent name is different than the current intent component’s name, a message appears prompting you to confirm your intention: click Yes, link it, to dismiss the message.)
This automatically renames the intent component, which might move up or down in the Intent Components section of the Components pane where components appear in alphabetical order.
This also creates a global mapping, in the NLU resource panel, between the specified intent and this intent component.
If you chose the wrong intent by mistake, you can unlink the intent component.
Unlink an intent component
This section explains how to relink an intent component after you linked it to the wrong intent by mistake—that is, when you realize you chose the wrong intent while relinking an intent component that had a broken reference to the intent it was previously meant to handle.
- On the Options menu, choose Unlink intent component.
The unlinked intent component moves to the top of the Intent Components section, and a broken link icon appears next to it. - Relink the intent component to the desired intent.
- Open the NLU resource panel, and notice the mapping that was created by mistake is now broken: the warning “Mapped resource missing” appears next to the entity name.
- Proceed as appropriate, depending on the situation:
- Delete the intent, if you no longer need it.
- Remove the broken mapping, if you are not yet ready to map this intent.
- Remap the intent to another intent component, generic component, or node.
Open the Options menu for a component
In most situations, to expand the Options menu, you can bring your pointer to the badge that shows the number of nodes next to the desired component, and then click the More options icon ![]() that appears.
that appears.
In the case of an intent component for which the mapped intent has been deleted, or which has been intentionally unlinked, click the broken link icon ![]() .
.
Feedback
Was this page helpful?
Glad to hear it! Please tell us how we can improve.
Sorry to hear that. Please tell us how we can improve.