Build your training set
With the skeleton of your model structure defined in terms of intents, entities, and links between the two, you can turn to building a training set to help your model recognize user utterances involving these intents and entities.
This involves:
- Adding/importing samples
- Annotating samples
- Modifying intents and annotations
- Verifying samples
Add samples
Samples are typical phrases or sentences that your users might say. They teach Mix how your users think (their mental models) when interacting with your application.
If your project includes multiple languages, be sure to select the appropriate language before you start to enter samples.
You can enter a maximum of 500 characters per sample.
In Mix.nlu, you can add samples in a few different ways:
- Add samples one at a time or a few at a time under a selected intent
- Import a larger set of samples using an uploaded .txt file.
Samples can be added one at a time under a selected intent in the Develop tab. Samples can also be added up to 100 at a time in the Optimize tab.
Samples can be uploaded as a .txt file from:
- Develop tab
- Optimize tab
- Mix dashboard
The more samples you include for each intent, the better your model will become at interpreting.
For optimal machine learning, samples should be based on data of real-world usage.
Add samples one at a time under a selected intent
To add samples:
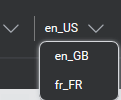
- (As required) Select the language from the menu near the name of the project.
- In the Intents area, click the name of the intent.
- In the “The user says” field, type a sample utterance and press Enter. For example, “I want a double espresso.”
- Repeat this procedure as needed to add samples.
Import multiple samples at once using text file import
To add multiple samples at once via a .txt file upload:
-
(As required) Select the language from the menu near the name of the project.
-
In the intents bar, click the
 upload icon. An Upload a file dialog will open.
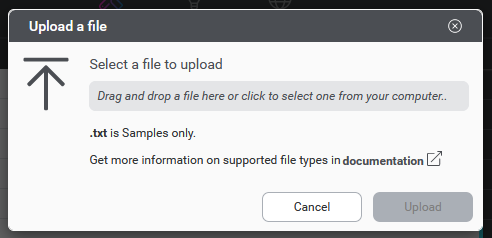
-
Use the file picker to select a .txt file containing samples.
-
Select an intent under which to upload the samples
-
Click Upload to initiate the upload
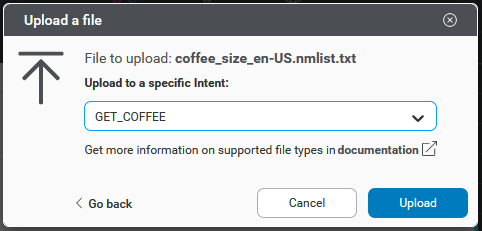
Samples uploaded to a specific intent are attached to that intent in Mix.nlu, but there is no annotation marked for any of the new samples. You will want to go in and add annotations after uploading.
The file upload in the Develop tab is intended for simple imports under one intent.
More advanced text file upload of samples is available in the Mix dashboard and in the Optimize tab. The dashboard and Optimize file import allow you to apply Auto-intent to the samples.
For additional details on importing samples, see Import data. For information about creating data sets, see Generating data and training the initial model.
Note on samples and contractions
Contractions are common in a number of languages, in particular in many European languages like English, French, and Italian. A contraction is a shortened version of a word or group of words combined together by dropping letters and joining with an apostrophe. For example, he’s and didn’t in English, c’est and l’argent in French, and c’è and l’estratto in Italian.
When sample sentences are added to Mix, whether via import or by typing the sentences in the Develop tab under an intent, the sample sentence is tokenized—broken up into individual tokens (individual units of meaning, usually words) that can be marked up with annotations.
For some languages, the tokenization may work differently than you might expect when encountering contractions using an apostrophe. Sometimes, the tokenization will split the two parts at the apostrophe, with the first part, apostrophe, and second part split as separate tokens.
There is not currently a workaround for this, but be aware that you may see this behavior in some cases.
Edit the sample text
To edit the text of a sample:
- Open the menu for the sample.
- Select Edit sample.
- Make the edits to the sample text.
- Press Enter or click the check icon to make the change. If you instead want to cancel the edit and go back to the existing text, press Escape or click the x icon.
The final step in developing your training set is to annotate the literals in your samples with entities and tag modifiers.
This will help your model learn to not only interpret intents, but also the entities related to the intents.
Samples and sensitive personal information
For training samples with entities that collect sensitive personally identifiable information, do not include real user data in your training samples. For these samples, generate representative synthetic examples instead.
Where applicable, you can also use regex-based or rule-based collection methods for these entities to help the model learn to generalize and recognize real world examples for these entities.
Samples, bias, and problematic content
When importing samples taken from real user utterances, be careful not to include problematic content. This includes things like profanity, talk of violence, or hate speech. You have a responsibility to identify these kinds of samples and remove them from your training set before you train your model.
Also, when building your training set, be aware of the potential for bias in your training set samples. Your model is trained on your training set, and will learn to recognize the patterns in your training set. If your training set is biased, your model will also likely be biased.
Annotate samples
To prepare the intent samples to be used for training, you need to annotate them with entities. As a simple example, consider the following sentence for an intent ORDER_COFFEE:
I want a large cappuccino.
Suppose that this intent has two linked entities, COFFEE_SIZE and COFFEE_TYPE. You can annotate this sample sentence to indicate which entities correspond to what literals. You could annotate the sample as follows:
I want a [COFFEE_SIZE]large[/] [COFFEE_TYPE]cappuccino[/]
Here, the word large is annotated with the COFFEE_SIZE entity and cappuccino is annotated with the COFFEE_TYPE entity.
Annotation use cases
Be aware that some of the details of annotation will depend on whether you are:
- Annotating tokens with no previous annotations
- Annotating previously annotated tokens
More details are available in the sections below.
Select tokens
To annotate a sample, you first need to select the relevant tokens in the sample that you want to annotate. Note that a literal can potentially span multiple consecutive tokens, for example, “United States of America”. Click on the first and last words for the literal. This highlights and brackets the span of words you want to label. It also opens an entity selection menu to select an entity label.
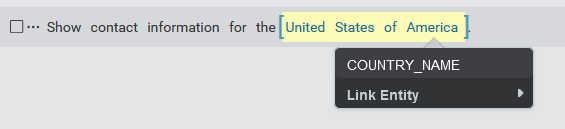
If you make a mistake and need to deselect and start again, simply click anywhere on the screen. Once you have finished selecting the relevant tokens, select the appropriate entity from the menu to apply the annotation.
Annotate tokens with no previous annotations
If you are annotating a previously un-annotated span of tokens, you can choose an entity from one of two sources in the entity selection menu:
- From a list of entities that have already been linked to the present intent. If any entities have already been linked, these will appear at the top of the list in the menu.
- From one of the other user-defined or predefined entities available in your project, using Link Entity.
- Select Link Entity from the menu.
- Select Custom Entities to browse the list of user-defined entities, or Predefined Entities to browse the list of predefined entities.
- Select an entity to complete the annotation. This entity will also be linked to the present intent.
Annotate previously annotated tokens
If you try to annotate a span of text that has already been annotated with an entity, the Link Entity option will be unavailable.
Generally, you will also not be able to annotate that span of text with any of the other entities linked to the intent. The exception to this is if a hierarchical relationship (hasA) entity has already been linked to the intent, and the entity for the annotated text is either the inner or outer part of that relationship. In that case the other entity will be available in the list of entities and you will be able to annotate over or within the same text.
For example, suppose your intent has a linked entity FULL_NAME, which is a hasA relationship entity containing two inner entities GIVEN_NAME and FAMILY_NAME. Suppose you have a sample with the following partial annotation:
Notify [FULL_NAME]John Anderson[/].
You will still be able to annotate within this span of text to annotate John with GIVEN_NAME and Anderson with FAMILY_NAME.
You can also still apply tag modifiers, as applicable.
Use tag modifiers
A tag modifier modifies or combines entities using a logical operator AND, OR, or NOT.
AND and OR modify two instances of the same entity type to represent one entity value and/or the other. NOT modifies one entity to represent not selecting that entity.
To add AND, OR, or NOT tag modifiers to your annotation, first annotate the entities you want to modify. Then select the entities to modify by clicking the first annotation and then clicking the last annotation. Select Tag Modifier and the appropriate modifier from the entity selection menu.
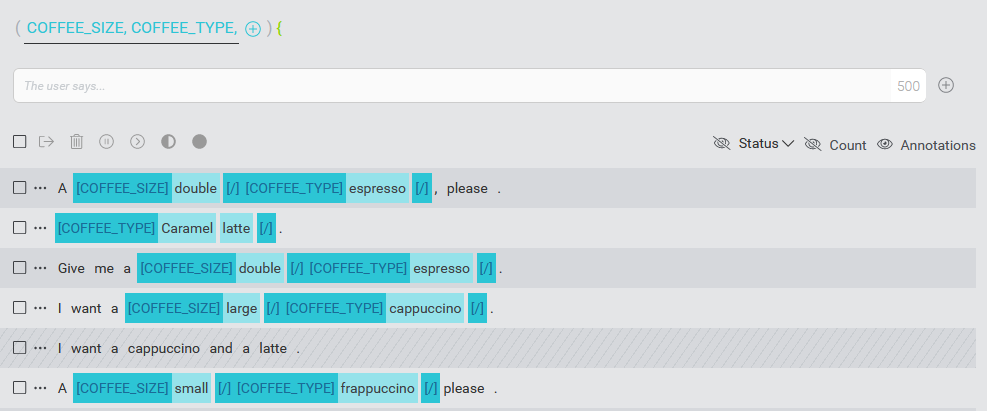
For example, consider the following partially annotated sentence:
I want a [COFFEE_TYPE]cappuccino[/] and a [COFFEE_TYPE]latte[/]
To annotate with the AND modifier, click the annotation for cappuccino and then the annotation for latte to select both as well as any tokens in between. With the span encompassing both COFFEE_TYPE annotations selected, choose the AND modifier in the Tag modifier sub-menu. The AND modifier is added, wrapping the two COFFE_TYPE annotations:
I want a [AND][COFFEE_TYPE]cappuccino[/] and a [COFFEE_TYPE]latte[/][/]
Annotating with an OR modifier is similar.
To understand how to annotate with a NOT modifier, consider the following partially annotated sentence:
I would like a [COFFEE_SIZElarge[/] [COFFEE_TYPE]coffee[/] with no [SWEETENER]sugar[/].
Here you want to add a NOT annotation to the sample to help your model distinguish between asking for sweetener vs asking specifically not to put sweetener. Click the word not and the SWEETENER annotation to select both, and then choose NOT from the Tag modifier sub-menu. The NOT modifier is added:
I would like a [COFFEE_SIZElarge[/] [COFFEE_TYPE]coffee[/] with [NOT]no [SWEETENER]sugar[/][/].
For information on verifying the status of samples, see Verify samples.
Modify intents and annotations
Mix.nlu provides various ways to modify the intents and annotations that you have added.
Fix incorrect samples
If you make typos while adding samples, or if some samples were not transcribed correctly, you should fix them to make sure that they correspond to what users actually said. This builds a better model.
To fix an incorrect sample:
- Click the ellipsis icon
 beside the sample that you want to edit and click Edit.
 - Correct the text as appropriate.
- Click the checkmark to save your changes.
Edit or remove annotations
To change an entity that annotates a sample:
- Click the entity in the sample then click Remove.
- To choose a new entity, click the literal and choose a new entity.
Change intent
To assign one or more samples to a different intent, use the Move selected Samples dialog. When moving sample sentences, you can choose to also move or delete any annotations that you’ve made.
You can move the samples to either an existing intent, or a new intent that you create on the fly.
There are three ways to initiate a change of intent for samples:
- Using the intent dropdown for a single sample in the Optimize tab
- Using the ellipsis menu for a single sample in Develop or Optimize
- By selecting one or more samples and selecting the move to another intent icon in the header bar in Develop or Optimize
To assign one or more sample sentences to a different intent:
-
Select one or more samples. You can click the ellipsis icon
or the intents dropdown (Optimize tab) for the sample to select a single sample, or use the checkboxes to select one or more samples. -
Select to move sample using one of the available ways:
- If using the ellipsis menu, click Move sample.
- If using the intents dropdown in Optimize, select one of the existing intents or create a new one. If you choose NO_INTENT or UNASSIGNED_SAMPLES, or create a new intent, the sample will be moved immediately to the chosen intent, and you will be done. Otherwise, proceed to step 3.
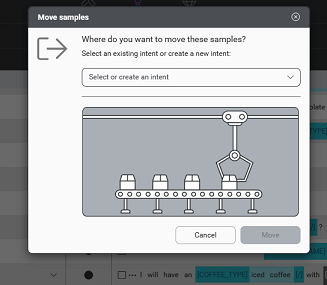
- If selecting with checkboxes, click the change intent icon in the header bar. This launches the Move sample(s) dialog.
-
In the Move samples dialog, if not done in the previous step, select an existing intent to move to, or create a new one. If choosing an existing Intent, pick a specific other intent, NO_INTENT, or UNASSIGNED_SAMPLES. If creating a new Intent, enter a name for the new intent.
-
Click Move to proceed.
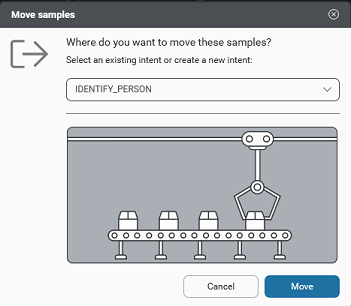
Mix.nlu will review the samples you are moving, the entity annotations for those samples, the target intent, and its linked entities as applicable. In the following cases, Mix.nlu will simply proceed with the move, and you will be done (otherwise proceed to step 5):
- The samples do not contain annotations
- You are moving the samples to a newly created intent. In this case, the entities will automatically be linked to the new intent upon moving.
- You are moving to an existing intent and the entities in the annotations are all already linked to the new intent
-
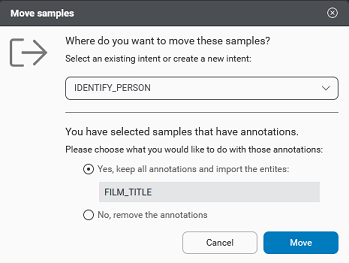
If the samples do contain annotations, and some of the entities are not already linked to the target intent, you will be invited to either keep the annotations and import the entities or remove them from the samples. (This choice is not available when moving intents to UNASSIGNED_SAMPLES. Annotations will be removed if moving to UNASSIGNED_SAMPLES.)
-
Click Move.
The verification status of the samples after the move depends on the initial verification state and how sample entities are being handled.
| Initial verification status | Final verification status |
|---|---|
| Excluded | Excluded flag removed. Goes to either Intent-assigned or Annotation-assigned depending on native state and previous considerations. |
| UNASSIGNED_SAMPLES | Goes to Intent-assigned. |
| Existing intent, Intent-assigned | Goes to Intent-assigned. |
| Existing intent, Annotation-assigned | If removing entity annotations, goes to Intent-assigned. If not removing entity annotations, goes to Annotation-assigned. |
Assign NO_INTENT
Sometimes an entity applies to more than one intent or, to look at it another way, an entity can mean different things depending on the dialog state. Rather than add this entity to multiple intents, it’s best to use NO_INTENT.
Consider these two example interactions. The first one is in the context of booking a meeting.
| Participant | Utterance |
|---|---|
| User: | Create a meeting. |
| System: | For when? |
| User: | Tomorrow at 2. |
This second example is in the context of booking a flight.
| Participant | Utterance |
|---|---|
| User: | Book flight to Paris. |
| System: | For when? |
| User: | Tomorrow at 2. |
In each of these interactions, there is a clear intent in the user’s first statement, but the second utterance on its own has no clear intent.
In this case, it’s best to tag “Tomorrow at 2” as [nuance_CALENDARX]Tomorrow at 2[/] to cover both scenarios (and not as [MEETING_TIME]Tomorrow at 2[/] or [FLIGHT_DEPARTURE_TIME]Tomorrow at 2[/]).
As shown in the examples, often these words or phrases are fragments and are used in a dialog as follow-up statements or queries.
NO_INTENT can also be used to support the recognition of global commands like “goodbye,” “agent” / “operator,” and “main menu” in dialogs. For more information, see Configure global commands in the Mix.dialog documentation.
Verify samples
Before training your model, verify your training sample data. This step involves reviewing each sample phrase or sentence for intents and entities and ensuring that they have been assigned the correct status. It also involves confirming which samples to include in the training set for the model, and which to exclude.
This process improves your model’s accuracy.
Verification of the sample data needs to be carried out for each language in the model, and for each intent.
Open and view samples by language and intent
To get started, open up the set of sample sentences for the language and intent.
- Open the Develop tab.
- (For multi-language projects) Select the language from the menu near the name of the project.
- Click an intent to view the samples.
Display status information
By default, status information for samples is not displayed. To see the status information, click the Status visibility toggle, above the samples on the right.
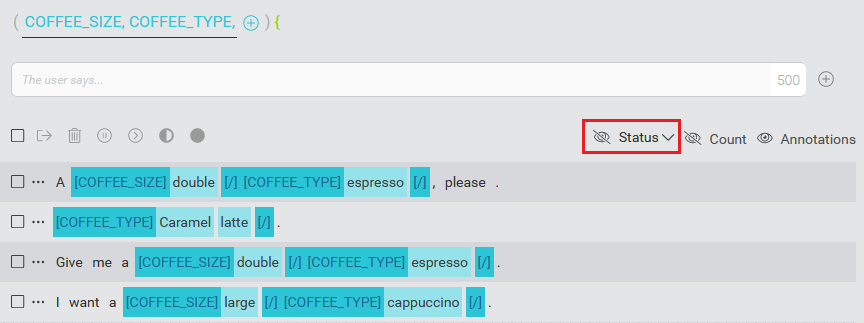
Status icons will then appear to the left of the sample items (Or on the right for samples in right-to-left scripts).

Note:
In the Unassigned Samples section, the status visibility toggle does not appear, as there are no status icons to display.In the same area as the Status visibility toggle are toggles for:
- Annotations: Hide/show annotations. By default, annotations are visible.
- Count: Hide/show sample count. By default, counts are hidden.
Overview of verification states
Samples can be in the following verification states:
| Icon | State | Description |
|---|---|---|
| Intent-assigned | A half-filled circle icon indicates that the sample has been assigned an intent.For example, via .txt or TRSX file upload, by adding a sample using Try, or by manually adding a sample phrase or sentence to an intent in the Mix.nlu UI. Sample may or may not be annotated. Impact of this state on the model: Samples assigned this state will only be used to detect the intent. The data provided by this sample will not be used to detect the presence of Entities. |
|
| Annotation-assigned | A filled-circle icon indicates that the sample has been assigned an intent and annotation is complete. Sample can be annotation-assigned via TRSX file upload or in the Mix.nlu UI. Sample may or may not be annotated.Impact of this state on the model: Samples assigned this state are used to detect the intent as well as any annotated entities. If such a sample contains a literal that appears in an entity but is not annotated, it will be used as a “counter example” for that entity; that is, it will lower the chance of such entity literals being detected. |
|
| Excluded | A “pause” icon indicates that the sample, although assigned an intent, is to be Excluded from the model. Sample can be Excluded in the UI or via TRSX file upload. Sample may or may not be annotated. Impact of this state on the model: Samples assigned this state are Excluded. |
Samples assigned to UNASSIGNED_SAMPLES, either via .txt or TRSX file upload or manually in the UI, do not have a status icon. These samples contain no annotations and are excluded from the model.
Exclude or include samples
You can exclude a sample from your model without having to delete and then add it again. By default, new samples are included in the next model that you build. By excluding a sample, you specify that you do not want it to be used for training a new model. For example, you might want to exclude a sample from the model that does not yet fit the business requirements of your app.
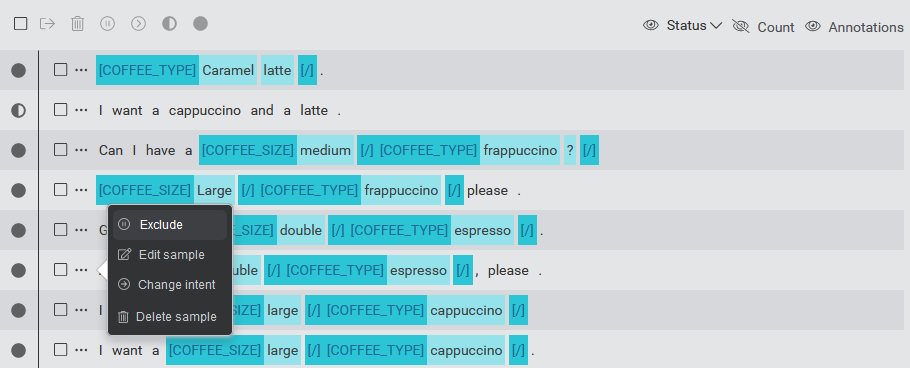
To exclude a sample, click the ellipsis icon ![]() beside the sample and then choose Exclude.
beside the sample and then choose Exclude.
An excluded sample appears with gray diagonal bars and the status icon changes to indicate it is excluded.
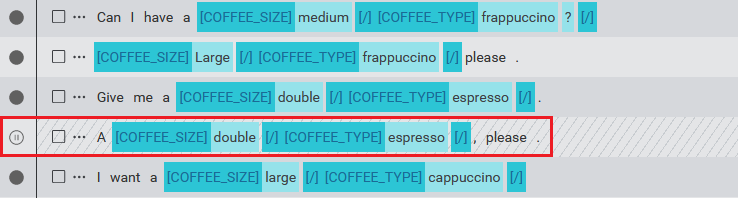
You can still modify the excluded sample. Any annotations that were attached to the sample before it was excluded are saved in case you want to re-include it later.
To include a previously excluded sample, either use the ellipsis icon menu or click on the status icon. The sample is restored to its previous state with any previous intent and annotations restored.
Change the status of a sample
When you start annotating a sample assigned to an intent, its state automatically changes from Intent-assigned to Annotation-assigned. This signals to Mix.nlu that you intend to add the sample to your model(s). You can always choose to assign a different state to the sample; for example, to exclude it (change the state to Excluded) or to use it to detect intent only (change to Intent-assigned).
To change the status of a sample, hover over the status icon and click. This will allow you to change the state from Intent-assigned to Annotation-assigned or vice-versa.
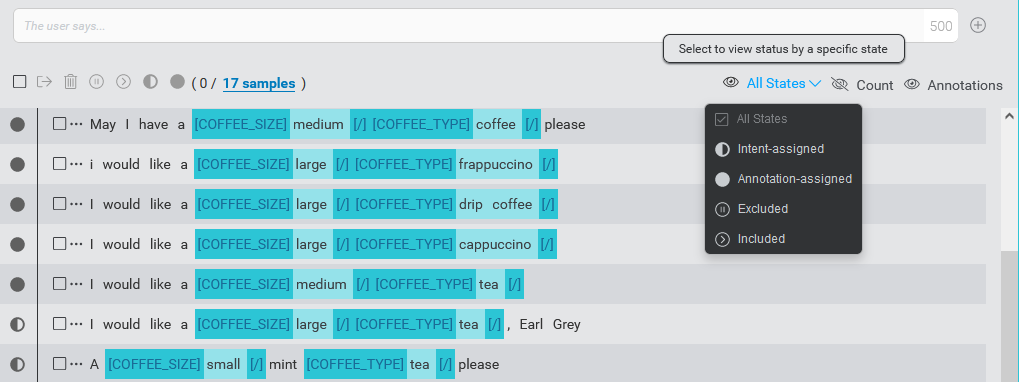
Filter displayed samples by status
When there are a lot of samples for an intent, you may want to filter the displayed samples by status. To do this, open the drop-down menu next to the status visibility toggle to choose the status to display.
Bulk operations
For convenience, bulk operations are available to allow you to perform actions on multiple samples within an intent at once. You can include or exclude samples, assign them as Intent-assigned, or assign them as Annotation-assigned. You can also choose to remove the selected samples or move them to another intent.
Before you can apply a bulk operation, you first need to select one or more samples.
There are a few ways to do this.
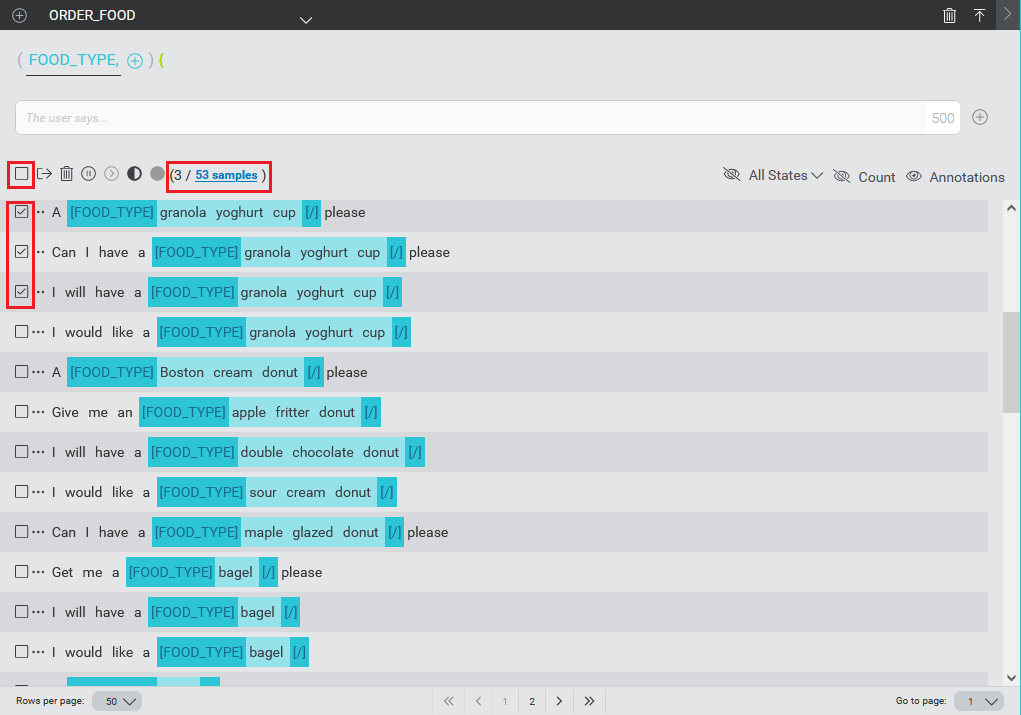
To choose a few samples on the present page, use the check boxes beside the samples to individually select the samples.
Alternatively, you can select all samples on the current page by clicking the Select this page check box above the list of samples. Clicking the check box beside an individual selected sample deselects that sample.
There is an indicator on the row above the samples indicating how many samples are currently selected out of how many total samples. When you have not yet selected samples, this will show 0 / total samples. The total samples count is shown as a hyperlink. Clicking the total selects all samples on all pages.
Deselecting an individual sample when all samples on all pages are selected deselects that sample, as well as the samples on the other pages not currently displayed.
Changing the number of rows per page or navigating to a different page within the intent will not affect the current selection if no other changes are made.
However, all selected samples will be deselected if you do any of the following:
- Go to another intent
- Apply a filter
- Navigate to a different tab
- Change the current language
- Adding, removing, or editing a sample
- Changing the sample count
- Adding or removing annotations for a sample
- Changing verification state of a sample
- Importing samples with file upload
Once you have selected a set of samples, apply the bulk operation to the selected samples by clicking the appropriate icon in the row above the samples.

The general idea here is that bulk operations apply to all selected samples, but there are operation-specific particularities you should be aware of.
| Operation | Notes on behavior |
|---|---|
| Exclude | Already excluded samples will stay as-is. Intent-assigned and Annotation-assigned samples will be excluded, but the previous state, including any assigned intent and annotations, will be remembered in case you want to re-include the sample. |
| Include | Already included samples will stay as-is. Previously excluded samples will be re-included with the same verification state as they had before being excluded. |
| Intent-assigned | Excluded samples are not impacted and stay excluded. |
| Annotation-assigned | Excluded samples are not impacted and stay excluded. |
Only visible samples can be selected for mass status change, that is, samples that have not been filtered from the view.
It is also possible to perform bulk operations in the Optimize tab. The Optimize tab allows a broader set of operations which can be applied across all intents rather than just one.
Notes
- You do not have to annotate every sample but you should set all samples that you wish to include in your model(s) as Annotation-assigned . This helps the model to ignore false entity matches.
- If you move an Annotation-assigned sample to another intent, its state changes to Intent-assigned. Confirm that the annotations are correct given the new intent. Any subsequent annotations you make will change the sample’s state to Annotation-assigned. You can always change the verification state as described earlier.
- You cannot accept or un-accept individual annotations within a sample. The annotation status applies to the complete sample.
- When training/building your model, you must include at least one sample that is either Intent-assigned or Annotation-assigned.
Related topics
Feedback
Was this page helpful?
Glad to hear it! Please tell us how we can improve.
Sorry to hear that. Please tell us how we can improve.