Step 2: Add NLU intents and entities
- Click NLU, on the toolbar, to open the NLU resource panel.
- Type a name for your intent—for example, ORDER_COFFEE—and click the Add intent icon
 .
.
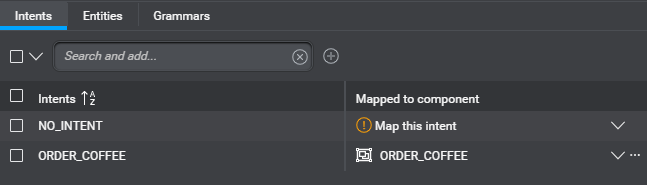
The new intent appears in the mapping table. - Next to ORDER_COFFEE, click Map this intent, and choose Create intent component.
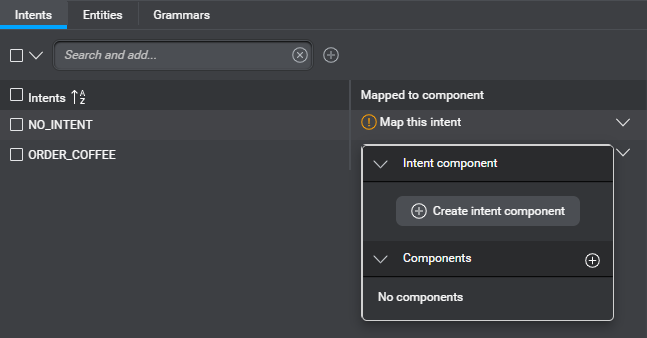
This adds a new ORDER_COFFEE intent component where you will design the part of the dialog to collect all the information required to fulfill this intent.
This also sets a global default mapping from the ORDER_COFFEE intent to the corresponding ORDER_COFFEE intent component.
- Switch to the Entities tab.
- In the search field, type a name for an entity your application is meant to collect—for example, COFFEE_TYPE.

- Click the Add entity icon .
- Select the desired data type for this entity (for example, Generic), from the list that appears in the upper-right area of the panel.
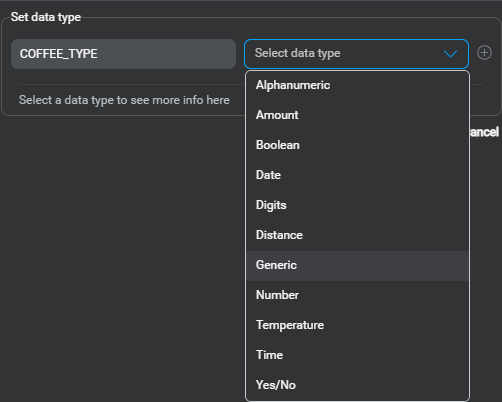
- Click the Add icon .
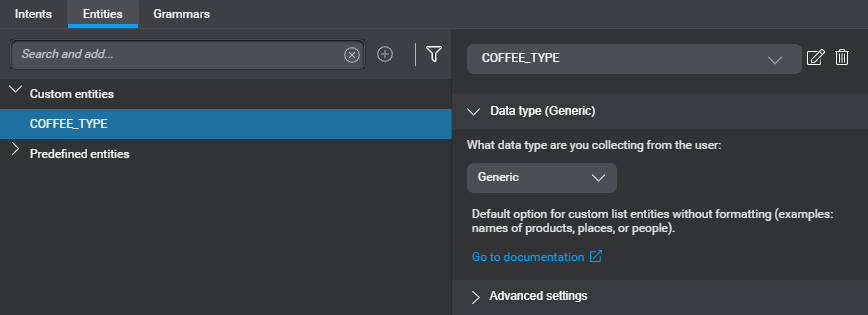
The new entity appears in the list of custom entities.
- Proceed in the same fashion to add, for example, COFFEE_SIZE.
- Click COFFEE_TYPE in the list of custom entities.
- Use the fields at the bottom of the Advanced settings section to add a few representative literal-value pairs—for example, enter literals espresso, ristretto, americano.
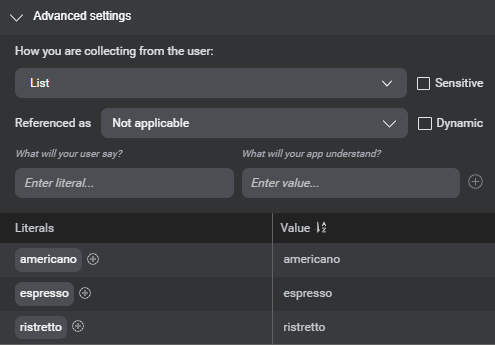
The literal text automatically doubles as the value, by default. If you want the value to be different, press Tab and type the desired value before pressing Enter. - Proceed in the same fashion to add a few representative literal-value pairs for the COFFEE_SIZE entity—for example, literals large, and small.
Multiple literals can have the same value, to help your application recognize the different ways a user might say an entity. - Click the Add icon next to the literal large, type double, and press Enter.
- Proceed in the same fashion to add the literal single, for the value small.

- Click NLU again, on the toolbar, to close the panel.
Feedback
Was this page helpful?
Glad to hear it! Please tell us how we can improve.
Sorry to hear that. Please tell us how we can improve.