Set assign actions
Question and answer nodes, message nodes, and decision nodes support assigning values to variables and entity attributes. You can also initialize variables in Start and Enter nodes. The variables, entities, operators and methods that are available on the right-hand side of an assign action depend on the type of the element on the left-hand side.
Use assign actions to set the value of variables or entity attributes—for example:
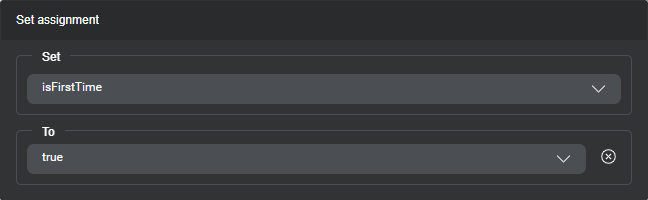
- Initialize a simple variable
- Set the .isRequired attribute of the ACCOUNT_NAME entity to
false, when the customer has only one account (see Entity lifecycle considerations for more information) - Store the value from a database lookup in a variable
- Set Active intent value to initiate intent switching manually
- Clear an entity by using the .clear() method
- Clear a complex variable by setting it to
NULL - Preinitialize a complex variable
- Store the current date or time in a variable
- Increment a counter
- Set a variable to a random number
- Set channel to switch to another channel
Warning:
In message nodes, messages are evaluated before assignments. If you want to set a variable (or entity) and use the new value in a message, make the assignment in a separate node (for example a decision node), upstream to the message node where you want to use the variable or entity value.Add an assign action
The steps you must perform for adding an assign action depend on where you want to add it:
- If the assignment must be limited to a specific channel, undock the desired channel if it isn’t already, and select it.
- Add an assignment placeholder if there isn’t one already.
- Click the assignment placeholder.

This opens the assignment editor. - Use the assignment editor to create your assign action.
Once you have created an assign action, you can perform various operations directly from the compact assignment in the Node properties pane, including:
Add an assignment placeholder
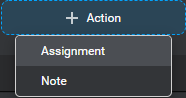
- If there aren’t any placeholders yet, click + Action and choose Assignment.
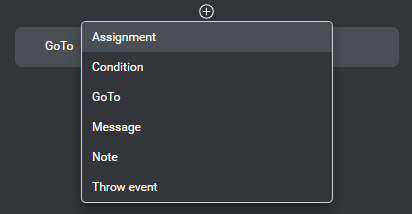
- If other messages, notes, actions, or conditions already exist, click the Add icon
 , where you want to insert the assign action, and choose Assignment.
- To add the first placeholder under a condition, click the Add icon and choose Assignment.
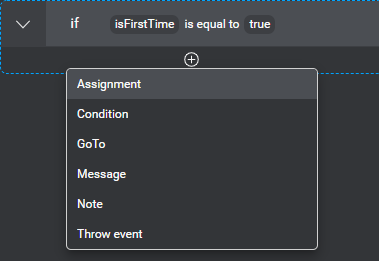
- To add an assign action under a condition where other messages, notes, actions, or conditions already exist, bring your pointer to the area where you want insert the message, click the Add icon that appears, and choose Assignment.
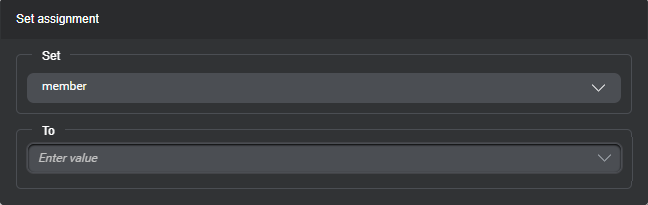
Use the assignment editor
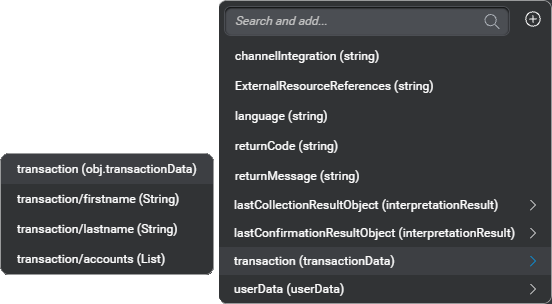
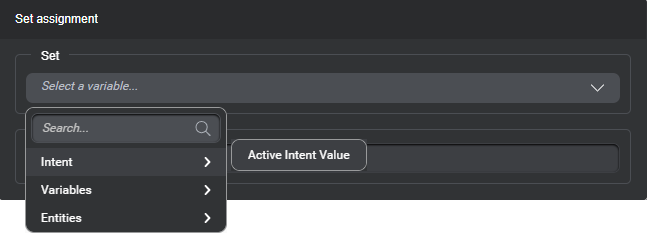
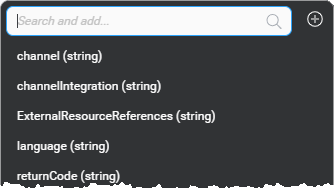
- Expand the Set list, point the desired category (Entities, Intent, or Variables) and choose the element whose value you want to set.
Tip: Use the search fields to narrow down the list if needed. If the variable you want to set is missing, you can create it on the fly.
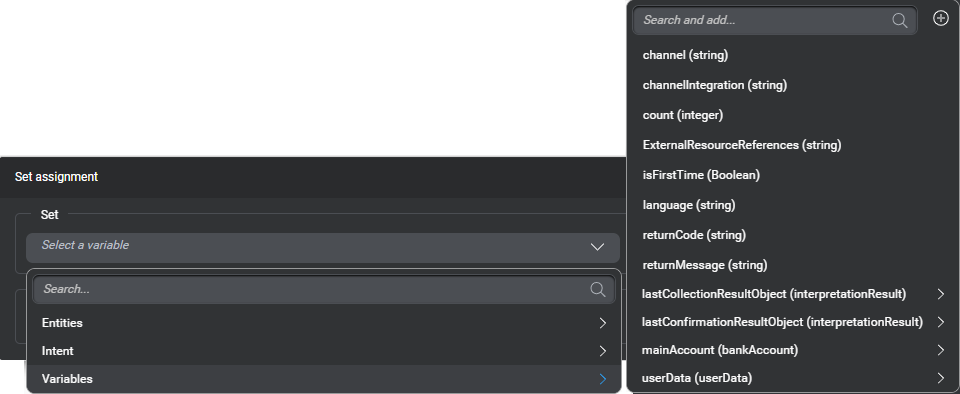
- Pointing a complex variable reveals its fields.
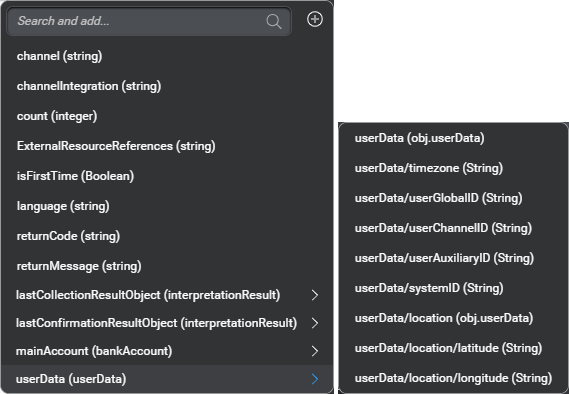
- Pointing an entity reveals its attributes.
- Pointing a complex variable reveals its fields.
- In the second field (To), enter a value, an expression, or choose another element.
This field (To) supports values that are compatible with the type of element you chose for the first field (Set). - Click outside the editor to close it.
The compact assignment shows the element being set and the value you specified.

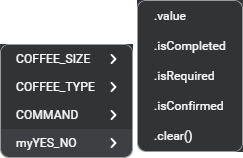
Clear an entity
Clearing an entity allows you to use it again during the same dialog session. For example, your dialog might include multiple question and answer nodes that collect a yes/no entity, or might allow the user to stop providing information to fulfill the active intent and start over afresh. Clearing an entity sets its .value and .literal attributes to NULL, .isRequired to true, .isConfirmed and .isCompleted to false.
- Navigate to the entity you want to clear.

- Choose .clear().
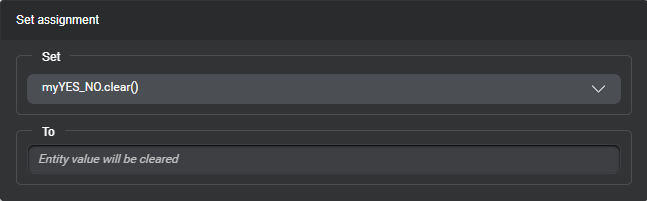
- Click outside the editor to close it.
The compact assignment shows the element being set and the value you specified.

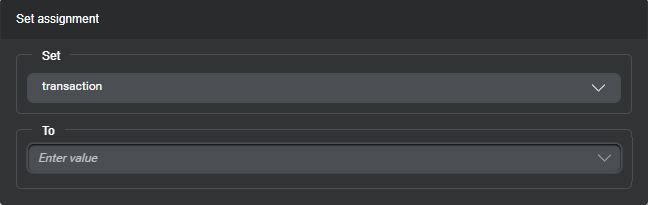
Clear a complex variable
Assign NULL to a variable when you don’t need its current value anymore. For example, your dialog might use a complex variable to hold a customer’s first name, last name, and a list of bank accounts, for a fund transfer intent. Once the fund transfer is completed, setting the complex variable to NULL allows you to use it again for another transaction during the same dialog session. This is similar to clearing an entity.
- Choose the complex variable you want to clear (use the top-level object).
Tip: Use the search fields to narrow down the list if needed.
The complex variable object appears in the Set field.
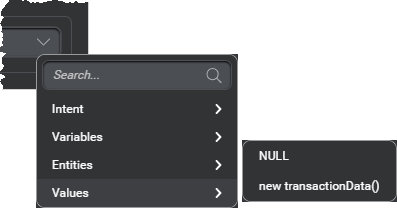
- Click the arrow icon
 at the end of the To field, point to Values, and choose NULL.
- Click outside the editor to close it.
The compact assignment shows the element being set and the value you specified.

Preinitialize a complex variable
You must preinitialize any complex variables you want to use in assign actions within your dialog design, or send to an external system that does not support NULL inputs.
Note:
Mix.dialog does not yet support preinitializing complex variables with fields whose data type is list.- Choose the complex variable you want to preinitialize.
Tip: Use the search fields to narrow down the list if needed.
- Click the arrow icon at the end of the To field, point to Values, and choose new var(), where var is the name of the schema for the complex variable.
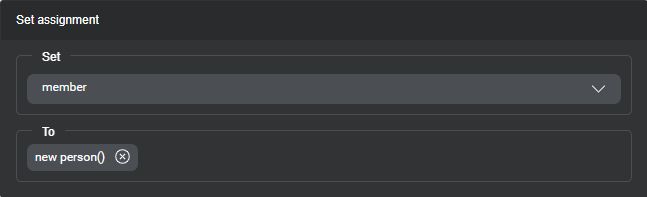
- Click outside the editor to close it.
The compact assignment shows the element being set and the value you specified.

- If this complex variable has fields that are also of a complex variable type, add assign actions, one for each complex field, and preinitialize them in the same fashion.

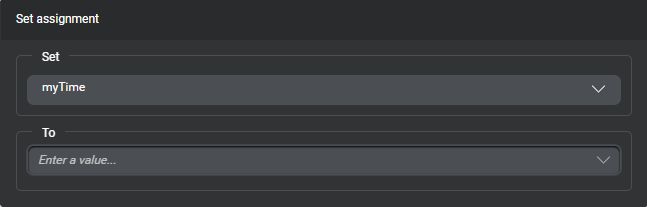
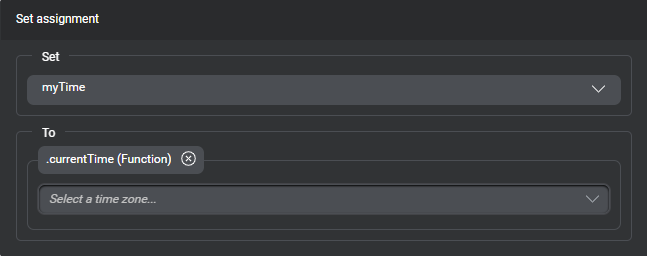
Use the current date and time
Self-hosted environments: This feature requires engine pack 2.2 (or later) for Speech Suite deployments; engine pack 3.10 (or later) for self-hosted Mix deployments.
The function .currentTime sets a variable of type time to the current time for the specified time zone. Likewise, the function .currentDate sets a variable of type date to the current date for the specified time zone.
Although it’s optional, it’s a good practice to always specify the desired time zone when using these functions. If you don’t, the time zone of the runtime environment will apply by default.
The value returned by .currentTime is in the 24-hour format (HH:MM).
If your design involves storing region-based time zone IDs in variables, make sure these IDS are spelled exactly (case-sensitive) as they appear in the IANA Time Zone Database. Examples: America/Montreal, Antarctica/DumontDUrville, Asia/Kuala_Lumpur. Refer to the list of tz database time zones , in Wikipedia.
If you must use custom (offset-based) time zone IDs, refer to Class TimeZone , in the Java platform documentation, for format details. Examples: GMT-09:30, GMT+2.
- Choose the variable you want to set—for example, myTime, a variable of type time, or myDate, a variable of type date.
Tip: Use the search fields to narrow down the list if needed.
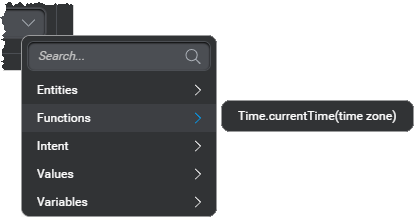
- Click the arrow icon at the end of the bottom (To) field, point to Functions, and choose Time.currentTime(time zone) or Date.currentDate(time zone), as desired.
- Use the bottom field to specify the desired time zone.
Tip: Use the search field to narrow down the list of time zones, variables, and entities. - Click outside the editor to close it.
The compact assignment shows the variable being set and the value you specified.

Use a mathematical expression
A variable of type integer can be set to the value of an arithmetic operation (addition, subtraction, multiplication, division, or percentage). Mix.dialog supports simple mathematical expressions involving:
- One operator
- A variable of type integer, before the operator
- A constant, or another variable of type integer, after the operator
Note:
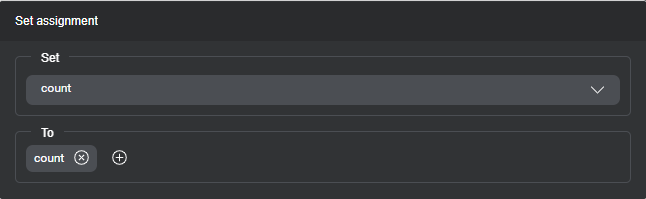
In an expression, the operations are evaluated based on the same operator precedence order that is used in JavaScript and Java.This example shows how to increment a variable to use it as a counter. (It assumes your design includes actions to initialize this variable, and reset it if needed.)
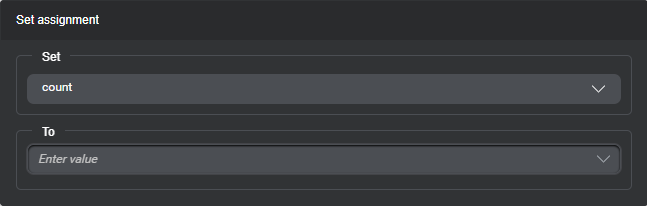
- Choose the variable you want to set—for example, count, an integer.
Tip: Use the search fields to narrow down the list if needed.
- Click the arrow icon at the end of the To field, and choose the same variable.
- Click the Add icon , and choose the desired operator—in this case, the + sign.
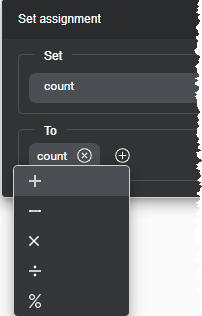
- Enter the number by which you want to increment the counter.
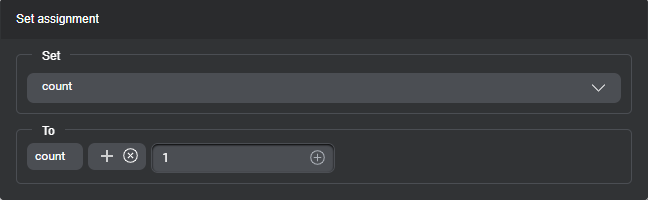
- Click outside the editor to close it.
The compact assignment shows the variable being set and the expression you specified.

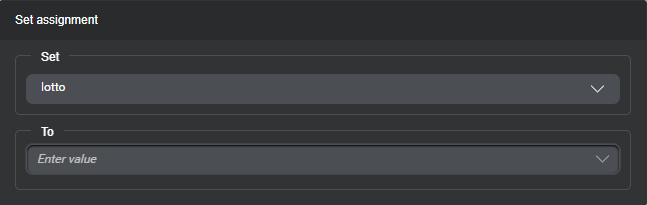
Use a random number
A variable of type integer can be set to a random value between 1 and a number you specify. In this example, a variable is assigned a random integer value between 1 and 6. Once you have set a variable to a random value you can use it in conditions, for example to play a random greeting message when your application starts, or to perform a random transition.
- Choose the variable you want to set—for example, lotto, an integer.
Tip: Use the search fields to narrow down the list if needed.
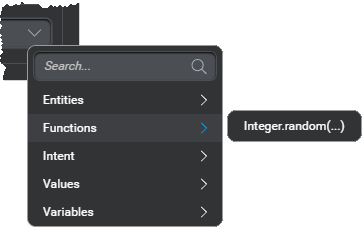
- Click the arrow icon at the end of the bottom (To) field, point to Helper Functions, and choose Integer.random(…).
- Enter the desired number in the bottom field.
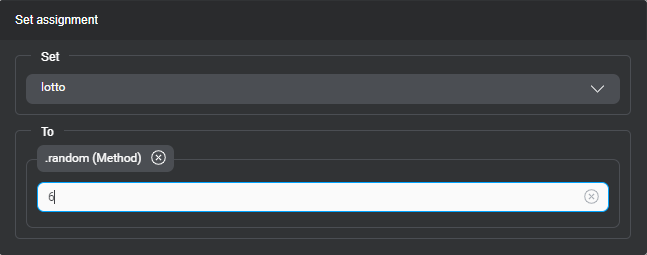
- Click outside the editor to close it.
The compact assignment shows the variable being set and the value you specified.

Switch intent manually
To initiate intent switching programmatically, you can use an assign action to modify the predefined variable Active Intent Value.
Intent switching requires Active Intent Value to be set before the dialog flow reaches the intent mapper node that will perform the switch.
If you set Active Intent Value downstream from the intent mapper node, the type of transition to apply depends on whether the intent mapper node is in the same component as the assign action, or in another component; and on whether a question router node is present in the component where the assign action takes place:
- With a question router node to support intent switching
If the dialog flow will be reaching a question router node with intent switching enabled, from the node at which you set this variable, make sure to set a Return to transition—not Return to intent mapper or Return—to return to the question router node.
This will allow the question router node to use its Switch Intent transition to return to the intent mapper node from which the current component was invoked, and the intent mapper node will automatically switch to the new assigned intent. - Without any question router node to support intent switching
If there isn’t a question router node configured to allow intent switching, in the component where you set Active Intent Value:- If the intent mapper node is in this same component, use a GoTo transition to loop back to the intent mapper node.
- If the intent mapper node is in another component, use a Return transition (if the current component is invoked from the intent mapper node), or a Return to intent mapper transition. This will allow the dialog to return to the appropriate intent mapper node, which will use its On Return transition, instead of switching intent automatically. Consider adding logic down the On Return transition—for example, add a decision node to check the value of a Boolean variable (such as if isIntentSet is equal to true), to loop back to the intent mapper node, which will then switch the dialog to the new assigned intent.
Alternatively, consider throwing a custom event to force the dialog to be picked up at a specific intent mapper node (or another node with the appropriate logic).
To set Active Intent Value:
- Expand the Set list, point to Intent, and choose Active Intent Value.
- Expand the To field.
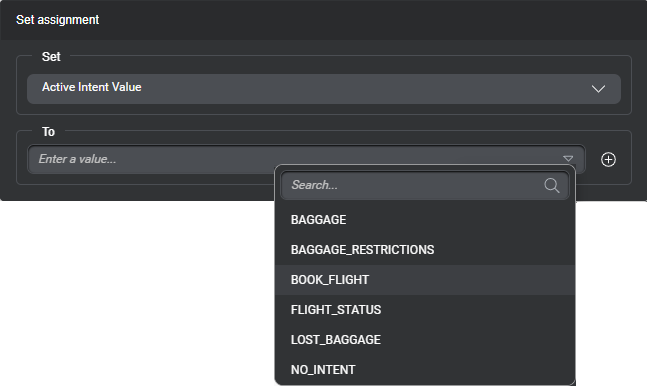
- Choose the desired intent.
Tip: Use the search field to narrow down the list if needed.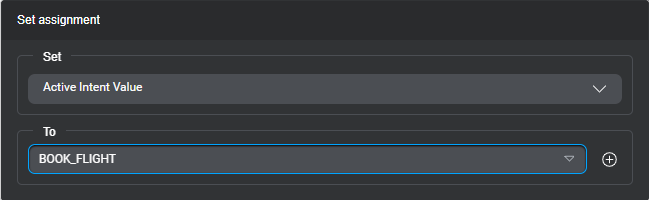
Alternatively, use the Add icon and choose the desired variable.
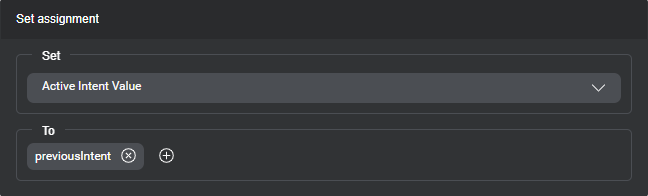
- Click outside the editor to close it.
The compact assignment shows Active Intent Value being set and the intent (or variable) you specified.

Switch channel
To switch to another channel programmatically, you can use an assign action to modify the predefined variable channel.
- Expand the Set list, point to Variables, and choose channel.
- Expand the To field.

- Choose the desired channel.
Tip: Use the search field to narrow down the list if needed. - Click outside the editor to close it.
Create a variable on the fly
When adding an assignment for a variable, or when setting an expression for a condition, you can create the variable directly from the search field at the top of the variable selector.
- Click the search field.
- Enter a name for the new variable (see Naming guidelines).
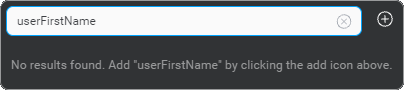
- Click the Add icon .
The new variable appears in the list, with an indication that its type is undefined.
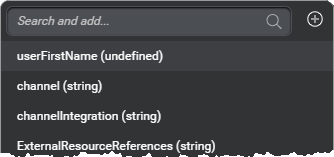
- Choose the new variable.
- Remember to use the Variables resource panel to complete its definition.
Depending on the data type, this is likely to be required before you can choose a value, use a method, or complete the desired expression for a condition. See Manage variables.
Delete an assign action
- Bring your pointer to the right-hand side of the assignment you want to delete.
- Click the More options icon
 that appears and choose Delete assignment.
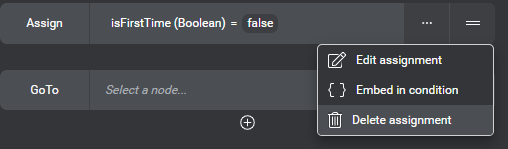
Create a condition from an assign action
- Bring your pointer to the right-hand side of the assignment for which you want to create a condition.
- Click the More options icon that appears and choose Embed in condition.
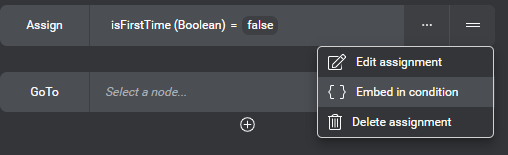
Your assignment now appears under a condition placeholder.
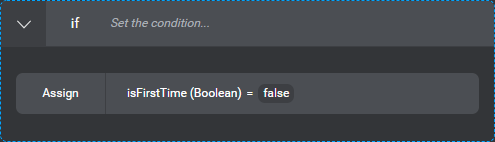
- Set the desired condition.
Feedback
Was this page helpful?
Glad to hear it! Please tell us how we can improve.
Sorry to hear that. Please tell us how we can improve.