Access and view data
The Discover tab provides tools to view and make sense of user input data from the applications associated with your deployed projects.
Gain access to Discover data
In order to bring user data from a deployed application into Discover, note that you need to have call logs and the feedback loop enabled for your specific Mix application.
Contact your Nuance representative for more details about how to set this up.
To view the data in the Discover tab, you also need to be a member of the organization where the project associated with the application lives, as well as the project itself.
View Discover data
To open the Discover tab for a project:
- From the Mix dashboard, select a project with a deployed application configuration.
- Click the .nlu icon to open Mix.nlu.
- Select the Discover tab.
When you first open the Discover tab, there will be no data displayed, and you will be prompted to select a source of data to display.
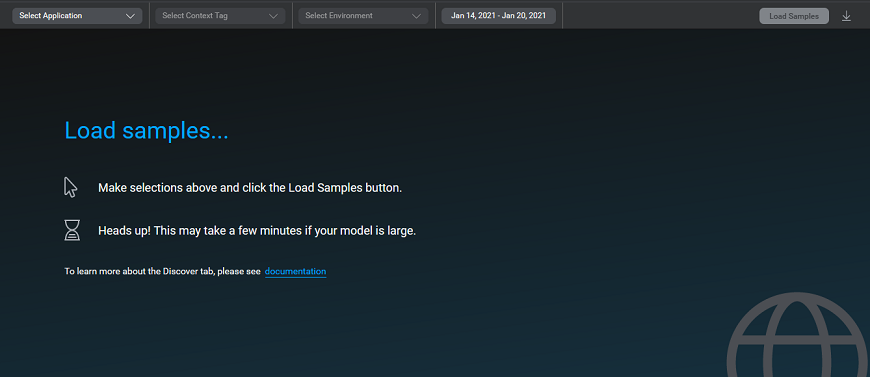
To access data for an application configuration within the Discover tab:
-
Use the selectors at the top of the tab to identify the source and time range from which to pull data.
-
Select the application, associated context tag, and deployment environment using the first three selectors to identify the source.
-
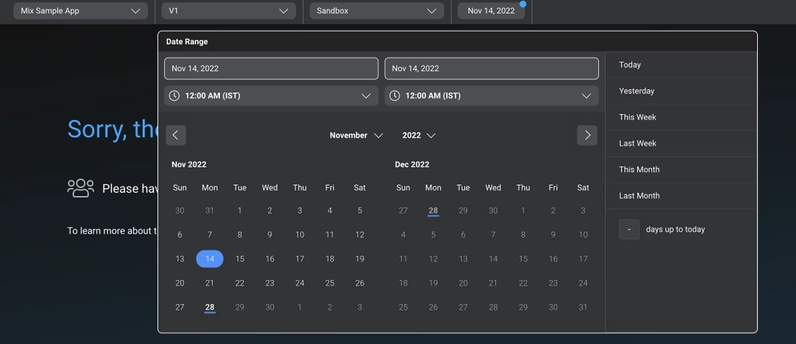
Select the date range and time range using the last selector to narrow down which data to pull from the specified source. By default, date range will select the past seven days, but you can choose a custom date range using either a start and end date, a number of days, or one of the available preset range options. If times are not selected, by default all data for the date range will be selected (12:00 AM on the start date until 11:59 PM on the end date).
NOTE: The start date can be no more than 28 days prior to the current date.
-
Click Load Samples.
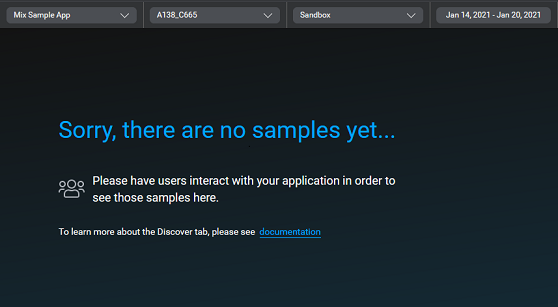
Mix.nlu looks for user sample data from the specified source and time frame. If there is data from the application in the selected time frame available to retrieve, it will be displayed in a table. The Load samples button becomes a Reload samples button.
If there is no applicable data, you will see a no samples screen instead.
Refresh Discover data
Sometimes you might want to refresh the displayed data for the same application configuration and date range. For example, if the date range includes the current day, you might want to see the very latest user inputs. To refresh the loaded samples, click the Reload Samples button.
Discover tab contents
Within the Discover tab, you can view information on speech or text input from application users. The information is presented in tabular format, with one row for each sample.
Here is more detail about the contents for each column in the table.
| Column | Description |
|---|---|
| Intent | The intent identified by the model for the user input. If the model determines that the sample does not seem to fit any of the expected intents, it will show NO_MATCH. NO_MATCH cases can help you identify intents that were not considered before but which are important to users. These can be added to refine and improve the model. |
| Samples | The content of the user input, as text. The sample may include annotations attached by the model if (1) the model identified an intent, (2) the identified intent has entities defined, and (3) the model confidently identified entity values in the sample. Note: For entities marked as sensitive in the model underlying the application, the information will show up as ****redacted****. |
| Score | The model’s level of confidence in the inferred intent, as a decimal between 0.00 and 1.00. |
| Collected on | Date and time the input was collected in your time zone. |
| Region | Deployment region where the user interaction occurred. |
If there is a lot of user data, the data is presented in pages.
You can sort the rows by the values of the Intent, Score, Collected on, or Region columns. Click on the column title to sort. By default, the data is sorted on the Collected on column to show the data in chronological order. Clicking on a column header a second time will sort on that column in the opposite order.
Invalid intents and entities
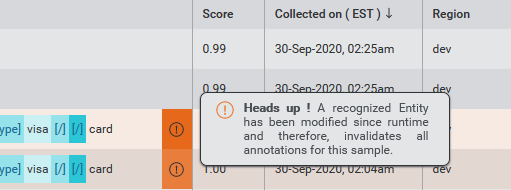
If you have changed the model ontology since last deploying your application configuration, and these changes impact the intents and/or entities interpreted for the samples, this is flagged in the table contents to remind you that the interpreted results are based on an outdated version of the model.
Intents and entities within the table will be visibly flagged with an orange marker if the intent or entity inferred by the application is no longer in the model ontology in Mix.nlu.

Change the intent for a sample
You can change the intent for a sample to one of the intents that are currently in the model ontology. This is useful if the model version used in the application interpreted the sample as an intent that is no longer in the model. This could happen, for example, if you have recently refactored your ontology.
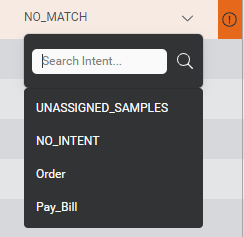
To change the intent for a sample, open the intent menu and select the desired intent.
You can choose either one of the existing intents, or UNASSIGNED_SAMPLES.
The sample will be labeled with the updated valid intent, and the the intent column will be marked with a blue dot to indicate that the intent has been updated.
Hovering over the dot will reveal a tooltip indicating the originally inferred intent.

Filter displayed data
As the usage of your application ramps up, and you get multiple pages of user data, the amount of recent data displayed in Discover can become difficult to make sense of.
The Discover tab provides filters to help reduce the displayed samples down to a smaller subset of samples. To do this, use the filter panel beside the table.
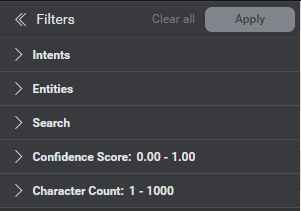
You can filter the samples on these dimensions:
- Intents: On one or more intents
- Entities: On one or more entities
- Search: By search string or regex pattern. Note: If the string entered in the search field is a valid regex pattern, then it will be treated as a regex pattern. Otherwise, it will be treated as a regular search string.
- Confidence Score: By confidence score range for the samples
- Character Count: By range for the length of the samples in characters
For Intents and Entities, you can select multiple items to include in each filter by clicking the available checkboxes. Click once on a checkbox to select and a second time to deselect.
Filters for which at least one selection has been made are marked with a blue dot. When you select the first item, the filter value is displayed on the filter label. If you select more than one item, a simple count of how many are selected out of the total number of options is displayed.
Within the Intents and Entities filters you can click Select All to check all the checkboxes; this makes it easier to select all except by selecting all then deselecting the specific items you don’t want to see. Clear All unchecks all the checkboxes for a filter.
Once you have chosen the filters you want to apply, click Apply in the filters header. The data displayed in the table will update to show only data corresponding to the filter values.
Clicking Clear all in the Filters header resets the selections in the filters to their original defaults and displays all samples.
You can hide the filter panel to free up space as needed and open it again to go back.
Feedback
Was this page helpful?
Glad to hear it! Please tell us how we can improve.
Sorry to hear that. Please tell us how we can improve.