User input properties
Choose the type of information to collect: either an NLU intent, or an entity. For an entity, determine whether value-specific actions are required.
In projects meant to support a VoiceXML application, if a question and answer node is meant to collect an entity whose values are determined by a speech grammar (as opposed to being subject to NLU), you can specify the required speech grammar for the appropriate channels. The ability to reference speech grammar files in question and answer nodes must be enabled in your project settings, for the appropriate channels.
For channels that support DTMF interaction, you can map DTMF keys to entity values, or specify DTMF grammars. The ability to reference DTMF grammar files in question and answer nodes is enabled by default, for channels that support DTMF. You can turn it off in your project settings.
Note:
Applications using Nuance Recognizer as a Service (NRaaS) don’t use external grammar references from Mix.dialog. For grammars used by NRaaS, refer to the NRaaS documentation.You can configure interactive elements for values of a yes/no, Boolean or custom entity. Only available in projects with channels that have interactivity enabled.
It is possible to disable input modalities for some channels at a specific question and answer node. For example, in an IVR application likely to be used in a public space, you might want to force users to enter sensitive information such as their PIN via the keypad rather than saying it out loud.
Allow a question and answer node to recognize more values than those available for the intent or entity it is meant to collect, by defining command overrides, which extend the global command entity for your project. Command overrides also let you configure local node-specific handling for any values of the global command entity.
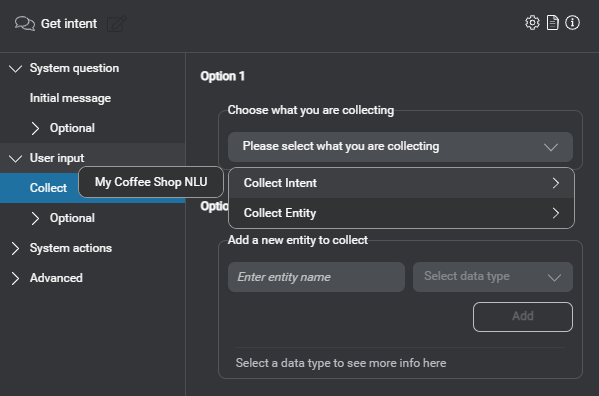
Choose the type of information to collect
Question and answer nodes support collecting intents and entities defined in your Mix project. The primary focus of a specific question and answer node is either collecting intents, or collecting a specific entity.
A question and answer node meant to collect the user intent usually works with a companion intent mapper node, which is responsible for directing the dialog flow to the intent component or generic component meant to handle the intent.
Collect intents and use Answers in case of nomatch
Note:
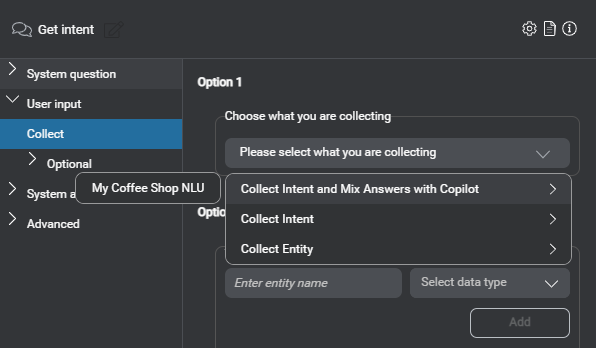
Answers and Builder are in preview. For more information, see Copilot in Mix (preview).- Expand User input and click Collect.
- Expand the selector, point to Collect Intent and Mix Answers with Copilot, and choose NLU for your project.
- Read the message that appears about the limitations for this preview feature and click Do it to dismiss the message.
- If Answers is not yet enabled for this project, click Configure Answers settings.
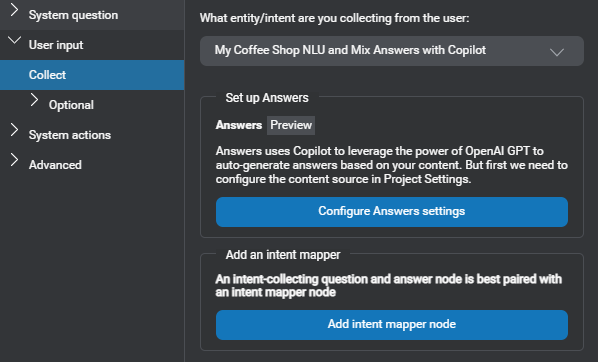
This opens the Project Settings panel, with the Answers with Copilot category in focus. Follow the instructions in Add support for Answers in an existing project.
The URL you specified appears in the Collect section of the user input properties for the question and answer node.
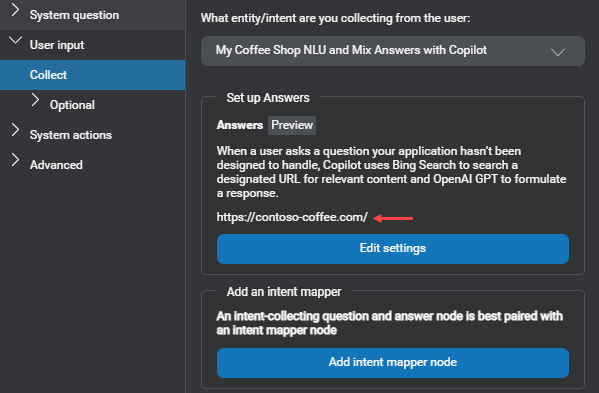
- Click Add intent mapper node.
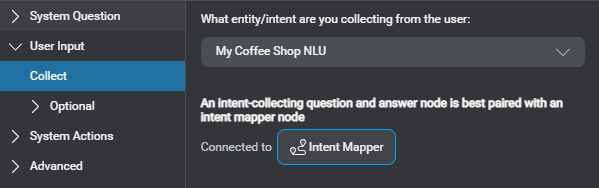
This automatically connects the question and answer node to an intent mapper node.
Notice the intent mapper node, on the canvas, indicates the number of intents that have a global mapping from the NLU resource panel. - If you are ready to set up the intent mapper node, click its name next to Connected to.
Collect intents
- Expand User input and click Collect.
- Expand the selector, point to Collect Intent, and choose NLU for your project.
- Click Add intent mapper node.
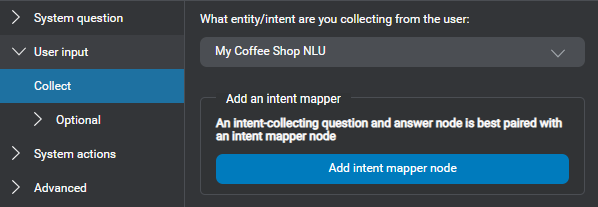
This automatically connects the question and answer node to an intent mapper node.
Notice the intent mapper node, on the canvas, indicates the number of intents that have a global mapping from the NLU resource panel. - If you are ready to set up the intent mapper node, click its name next to Connected to.
Collect an entity
A question and answer node meant to collect an entity can work with a companion question router node, which is responsible for handling the collection of all entities required to fulfill a specific intent and also for switching the dialog flow to another intent component or generic component when required.
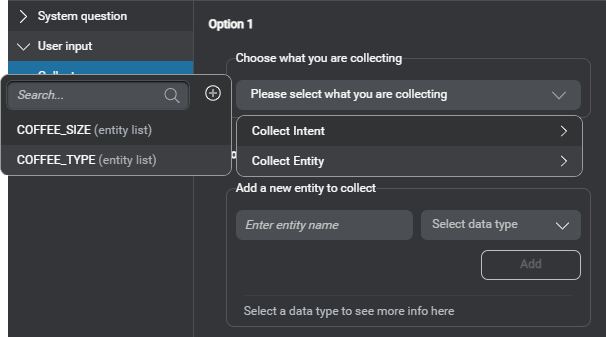
- Expand User input and click Collect.
- Expand the selector, point to Collect Entity, and choose the entity to collect.
Tip: If your project does not yet have the entity you want to collect, you can create it on the fly.
The selected entity is now the primary focus of this question and answer node.
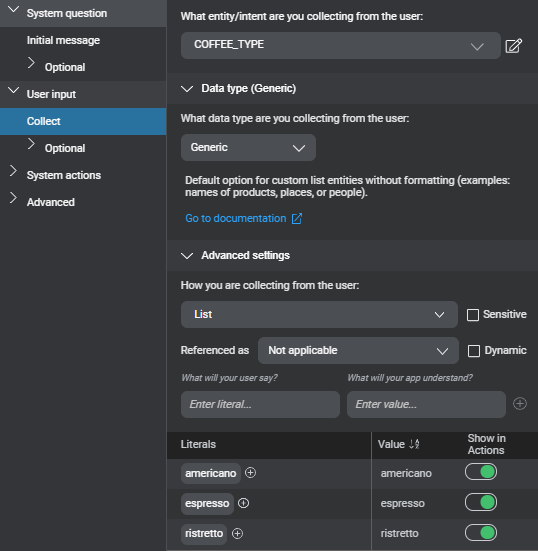
- Expand Advanced settings.
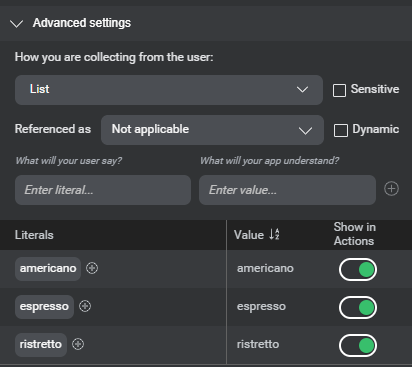
- If the current collection method is not List, turn on Edit collection method.
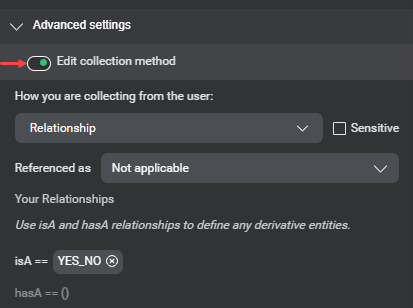
- If desired, you can use the list under How you are collecting from the user to change the collection method for this entity.
- If this node is meant to collect a list entity whose values are all meant to be handled the same way, turn off all Show in Actions switches.
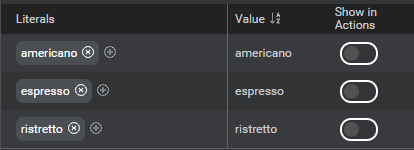
- Otherwise, if the list entity to collect requires value-specific behaviors, turn on the Show in Actions switches for the desired values.
- If this node is meant to collect a list entity for which the set of values can only be fully determined at runtime, click the Dynamic check box if it isn’t already selected (see Dynamic list entities for more information).
- If this node is meant to collect an entity that will hold sensitive information that must be masked in application logs, click the Sensitive check box if it isn’t already selected.
- If this is an entity for which you want to be able to recognize anaphoras, choose the appropriate anaphora type from the list next to Referenced as.
- Optionally, if this node is in an intent component (or in a generic component meant to fulfill an intent) but wasn’t created directly from the question router node, choose a question router node to handle any captured entity or intent that is not the entity in focus at this point in the dialog flow.
Note:
In a multilingual design, you can only turn on the Show in Actions switches for entity values that exist for every language in the project.Create an entity on the fly
When setting up a question and answer node, you can create an entity directly from the entity selector. This scenario shows how to add a Yes/No entity with its default isA relationship to the dialog predefined entity YES_NO. See Manage entities for more information.
- In the search field, type a name for the new entity (see Naming guidelines)—for example, myYES_NO.
- Click the Add icon
 .
.
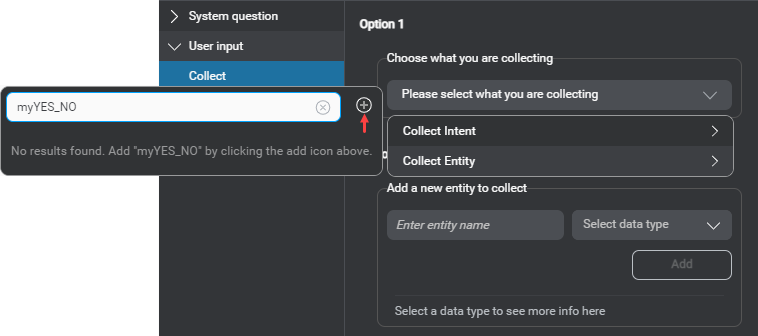
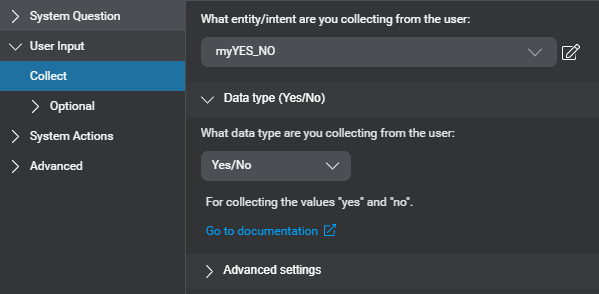
- Select the desired data type for this entity (in this case, Yes/No), from the list that appears in the upper-right area of the Node properties pane.
- Click Add.
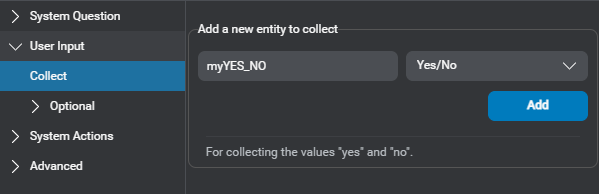
The new entity is now the primary focus of this question and answer node.
Specify grammars
Mix supports external GrXML grammars. The options available for a specific channel depend on the input modalities it supports. Unless you have specified one or more base URLs for external grammars in your project configuration, grammar files must be placed in specific directories, relative to the client application, that is basePath/language/grammars/channel/, where basePath is the path to where the client application expects to find all required language-specific material (audio files and grammars), language is a directory named after the appropriate language code (for example, en-US, fr-CA), and channel is the name of the channel using the grammar files (or “default” for grammar files that apply to all channels).
Grammar references set in Project Settings for your global command entity apply to all question and answer nodes.
The Grammars tab of the NLU resource panel allows you to export a grammar specification document, to help design and manage external grammars referenced by a VoiceXML application.
At a specific question and answer node, you can:
- Specify local speech and DTMF grammar references for all channels, which take precedence over any corresponding global grammar references
- Specify channel-specific grammar references, which take precedence over any local grammar reference
- Disable a global grammar reference locally for all channels
- Disable a grammar reference locally for a specific channel
- Reset a local grammar reference
Notes:
- To be able to reference external speech or DTMF grammars at a question and answer node, the desired options—that is, Reference speech grammars in nodes, or Reference DTMF grammars in nodes—must be turned on for the appropriate channels, in your project settings.
- At runtime, nodes that reference a speech grammar for the entity they are meant to collect do not use the NLU model at the collection turn. Therefore, when setting up a question and answer node with a speech grammar reference, make sure any required command grammars, for speech interaction, are configured as well.
Likewise, if you specify a speech grammar to support command overrides at a specific node, you must also specify the appropriate grammar for the entity in focus.
These limitations only apply to speech grammars—a question and answer node can use the NLU model and DTMF grammars concurrently.
These limitations do not apply to the confirmation turn—a question and answer node can use the NLU model for collection, and grammars for confirmation; or use grammars for collection, and the NLU model for confirmation. - External DTMF grammars are required if you want your VoiceXML application to support sequences of digits, or dynamic DTMF options.
Add a local grammar reference
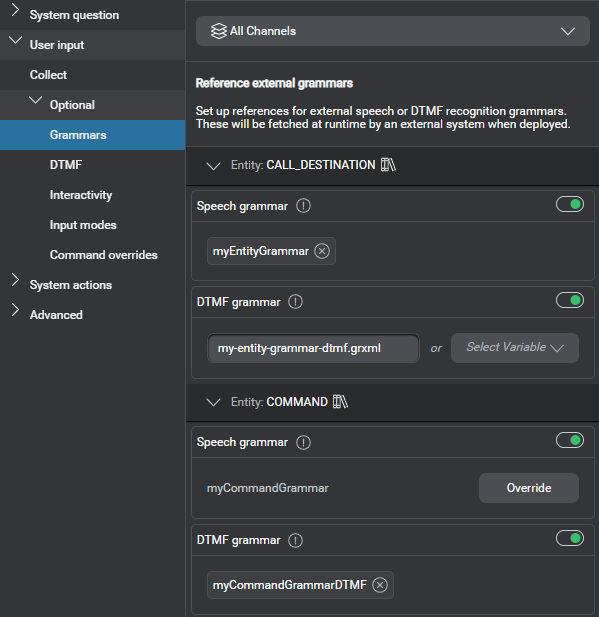
- Expand User input, then expand Optional, and click Grammars.
If you added command overrides at this node, a separate section appears for your global command entity, and it shows the global command grammar references from your project settings, if any.
Note that, if you prefer to use a single grammar to support both the entity in focus and the command overrides, you can disable the global command grammar.
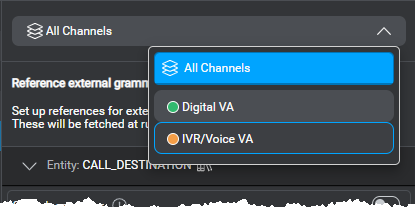
- If the grammar is for a specific channel, choose the desired channel.
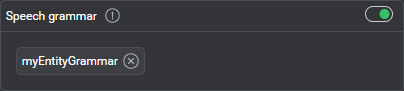
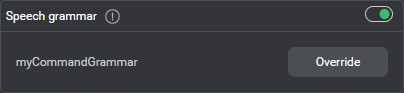
- Turn on the switch for the grammar reference you want to specify, if it is not on already.
- Click Override, if a grammar reference was already specified globally (or locally for all channels, and you are now setting a reference for a specific channel).
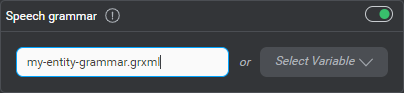
- Use the appropriate field to either:
- Enter the name of the desired grammar file, including the extension (for example, my-entity-grammar.grxml).
- Expand the variable selector, and choose the variable that is meant to hold a dynamic grammar reference at runtime.
Tip: Use the search field to narrow down the list if needed. If the variable you want to use is missing, you can create it on the fly, and then use it immediately. (To remove a dynamic reference, click the Remove icon next to the variable’s name.)
- Enter the name of the desired grammar file, including the extension (for example, my-entity-grammar.grxml).
Note:
As a best practice, if you specified a DTMF grammar for the entity in focus at this node, clear any DTMF mappings for values of this entity. Likewise, if you specified a DTMF grammar for your global command entity, clear any DTMF mappings for values of this entity. This will facilitate maintenance, and prevent conflicts with the external DTMF grammars.Disable a grammar reference
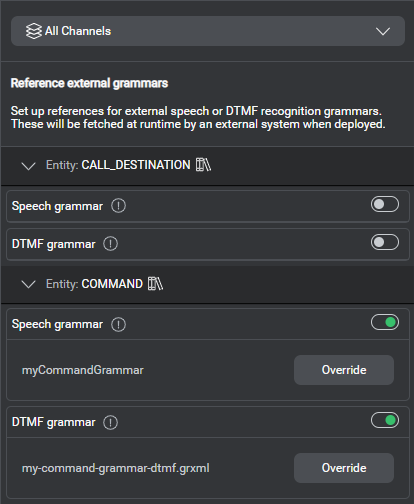
- Choose the channel for which you want to disable the grammar, if it isn’t already selected.
- Turn off the switch for the grammar reference you want to disable.

Reset a local grammar reference
Click the Reset icon ![]() .
.
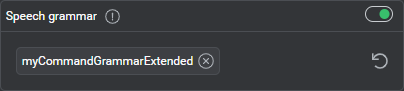
This restores the applicable grammar reference, if any, that was set at the nearest higher level.
Set DTMF mappings
Setting DTMF mappings for entity values to be collected at question and answer nodes allows you to generate DTMF grammar specifications, to be used by a VoiceXML application. Use the Grammars tab of the NLU resource panel to export the DTMF grammar specification for your project.
Notes:
- As a best practice, don’t set DTMF mappings for values of the entity in focus at this node, if you specify an external DTMF grammar for this entity (see Specify grammars).
- Likewise, don’t set DTMF mappings for values of the global command entity for this project, if you will be using an external DTMF grammar for this entity (see Specify grammars for commands).
- In a multilingual design, you can only set DTMF mappings for entity values that exist for every language in the project.
To specify DTMF mappings:
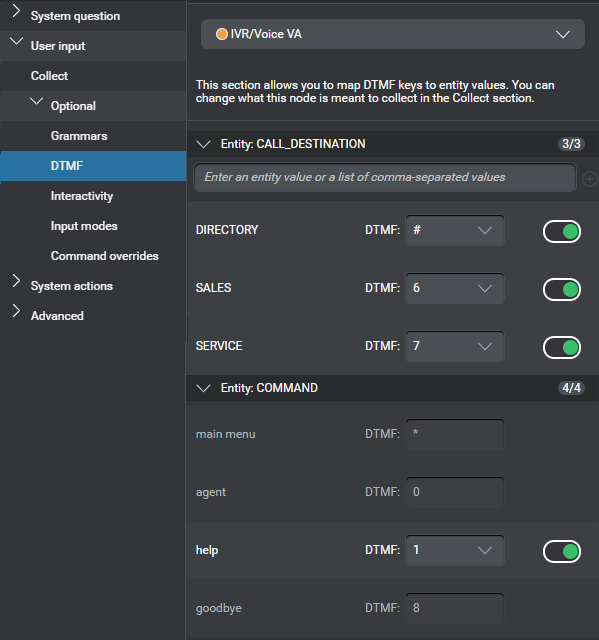
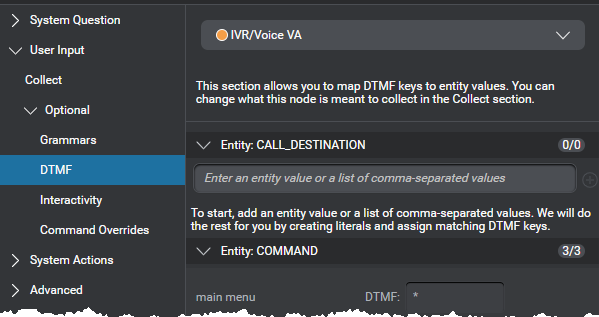
- Expand User input, then expand Optional, and click DTMF.
- If the entity for which you want to specify DTMF mappings has not yet been selected for collection at this node, use the list to select it.
If the entity does not yet exist, you can create it on the fly. - Choose the channel to which the DTMF mappings will apply, if it isn’t already selected.
Only channels that support DTMF are available for selection. - If this node is collecting a list entity, you can quickly add entity values on the fly, directly in the DTMF section, as needed.
- Turn on the switch next to a value you want to map to a DTMF key.

- Choose the desired DTMF key for this entity value.
- Proceed in the same fashion until you have completed the mappings for all applicable channels.
- (Optional) Export the grammar specification document, to be used by a VoiceXML application, if desired.
Create an entity on the fly in the DTMF section
When setting up a question and answer node, you can create the entity to collect directly in the DTMF section.
- Expand the list, under What entity/intent are you collecting from the user.
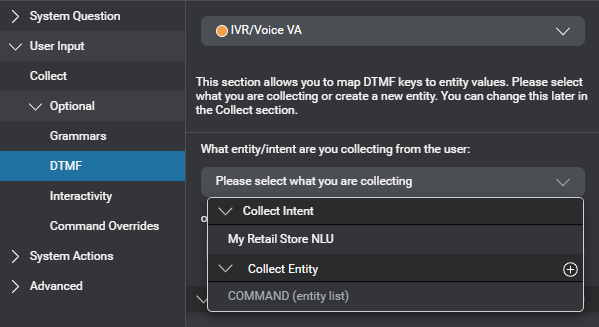
- Click the Add icon next to Collect Entity.
- Type a name for the new entity (see Naming guidelines)—for example, CALL_DESTINATION.
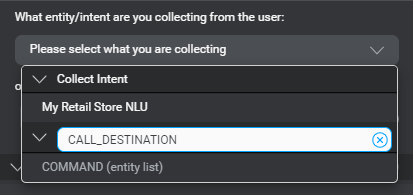
- Press Enter.
The new entity is now selected for collection at this node.
- If this node is meant to collect a Boolean, or a yes/no entity, navigate to the Collect section to set the required data type.
Add entity values on the fly in the DTMF section
- Type one or more comma-separated values, in the field under the entity name, and press Enter.
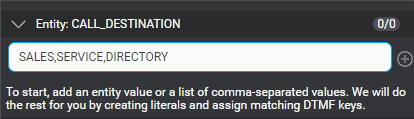
This creates the new values, and automatically maps them to DTMF keys.
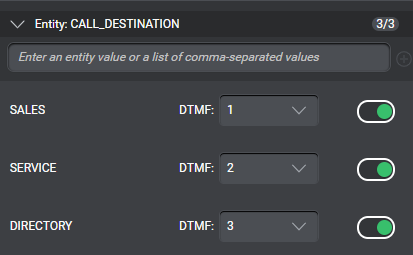
- Turn off any mappings you wish to disable.
Note:
To support value-specific actions and conditions, remember to add each required value for this list entity, with the same spelling, for every language in your project.Define interactive elements
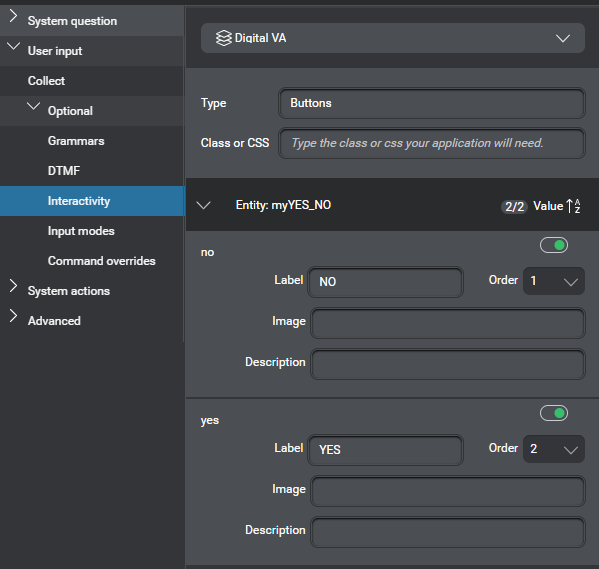
In a project with channels that support interactivity, question and answer nodes that collect Boolean, yes/no, or custom entities let you configure interactive elements such as buttons.
To define interactive elements:
- Expand User input, then expand Optional, and click Interactivity.
- In a multichannel project, if interactive elements must be limited to a specific channel, undock the desired channel (if it isn’t already undocked) and select it.
- (Optional) In the upper fields, enter the type of your interactive elements, such as Buttons, List, or Carousel, and the name of a class or inline CSS code to format them, if desired.
Your dialog application will pass this information on to the client application. - Turn on the switches for the values for which you want to create interactive elements.
- For each interactive element, enter:
- A label, such as the text to show on a button—optional if a link is specified.
- A link (URL or relative path) for the image to use on a button—optional if a label is specified.
- A description—optional.
- (Optional) Change the order of the elements, if needed.
- If your project supports multiple languages, use the menu near the name of the project to switch to another language, and proceed in the same fashion until you have configured every interactive element required for your application.
Note:
The Try mode does not support formatting of interactive elements. During preview sessions, any information in the Type and Class or CSS fields is ignored.Set local input modalities
Self-hosted environments: This feature requires engine pack 2.4 (or later) for Speech Suite deployments; engine pack 3.11 (or later) for self-hosted Mix deployments.
To disable input modalities at this node:
- Expand User input, then expand Optional, and click Input modes.
Input modalities for all enabled channels appear.
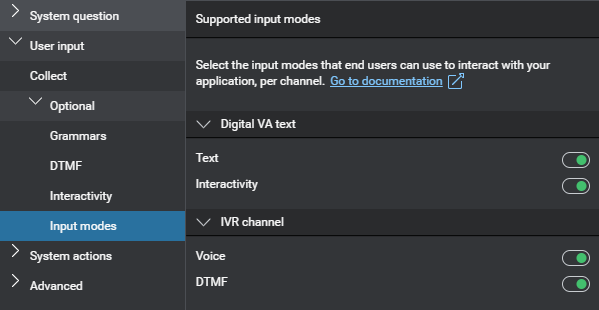
- Turn off the switches for any modalities you want to disable.
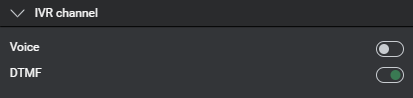
For example, turn off the Voice switch for the IVR channel, to force users to use DTMF at a question and answer node that collects sensitive information such as a PIN.
Note:
If a modality is disabled locally, you can enable it again by turning on the corresponding switch, if desired. If a modality is disabled at the channel level, the switch is not available. See Manage targets for more information.Configure command overrides
If you want a question and answer node to be able to recognize more values than those available for the intent or entity it is meant to collect, or to handle specific commands locally, configure command overrides. This allows you to set up specific actions (including interactive elements and DTMF mappings, as required) for values of your project’s global command entity. In projects meant to support a VoiceXML application, this also allows you to specify local GrXML grammar references for your command entity to support speech and DTMF interaction at this question and answer node.
For example, at a node collecting a yes/no answer, you might want to allow users to respond: I don’t know, which the predefined YES_NO entity does not directly support. Another example: at a node collecting a library card number (digits), you could allow users to say I don’t have it, and let the application fall back to asking for a phone number.
Note:
In a multilingual design, you can only create overrides for command entity values that exist for every language in the project.Add command overrides
To override the global handling for an existing command, support a new command locally, or supplement the intent or entity in focus at this node:
- Expand User input, then expand Optional, and click Command overrides.
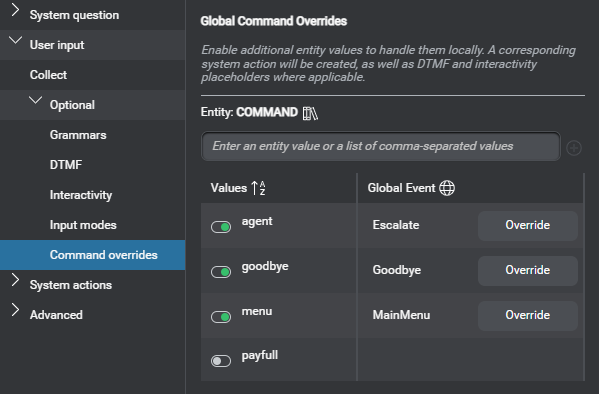
- If the value you want to use does not yet exist, you can add it directly in the field above the table.
You can enter multiple values at once, if desired.
Remember to add literals for the new values, and train your NLU model to support the new values. Note that, in a multilingual project, you must add each desired value separately, for each language, with the exact same spelling.
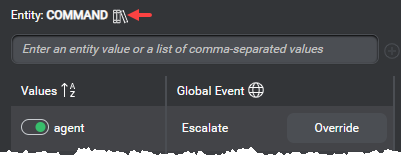
Tip: Click the Library icon, next to the name of your command entity to open the Entity tab of the NLU resource panel.
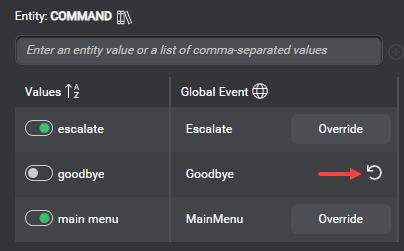
- Click the Override button, next to each global command you want to handle locally, at this node, if any.
- Turn on the switch for any command entity values you want to use to extend the focus of this node.
- Set the desired system actions for the specified command entity values.
- Define interactive elements for the specified command entity values, if desired.
- Set DTMF mappings for the specified command entity values, if desired.
- If your dialog design is meant to support a VoiceXML application, specify local speech and DTMF grammar references for your command entity, as needed.
Remove a command override
- Click the Reset icon
 next to the override you want to remove.
- Click Yes to dismiss the message that prompts you to confirm your intention.
This deletes all system actions, any interactive element, and any DTMF mapping defined in this node for this entity value. Removing the last command override at this node removes any local grammar references specified for the command entity as well.
If there is a global command configured for this entity value, removing the override restores the global handling for the command at this node; otherwise, if the value is not configured as command, this node will no longer recognize it.
Disable a globally-enabled command at this node
Turn off the switch for the value associated with the command.
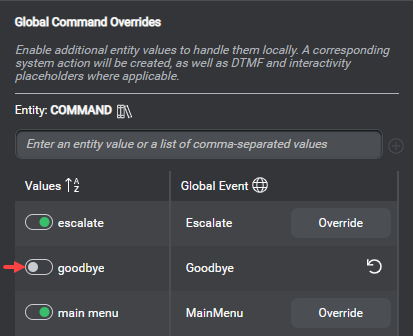
Enable a globally-disabled command at this node
Turn on the switch for the value associated with the command (or click Override).
Feedback
Was this page helpful?
Glad to hear it! Please tell us how we can improve.
Sorry to hear that. Please tell us how we can improve.