Add and import
You can add samples in two ways:
- Using a sample editor
- By uploading samples as a text file
Add multiple samples to an intent
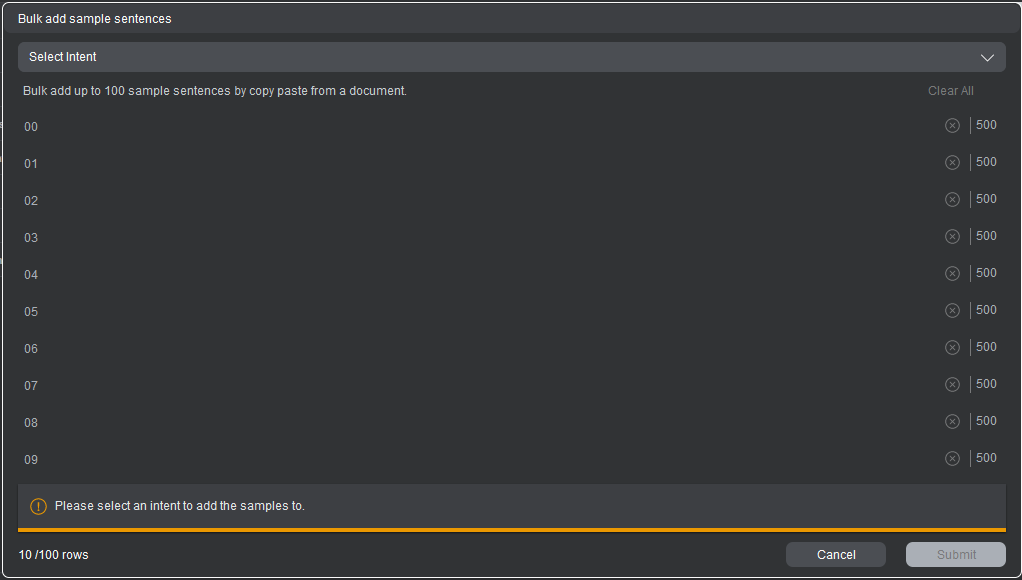
A Samples editor provides an interface to create and add multiple new samples in one shot. This serves as a faster way to create new samples.
Samples are added as plain text without annotations. Individual samples can have up to a maximum of 500 characters. You can add up to 100 samples at one time using this editor.
Tip:
To upload a larger set of samples, the file upload functionality in the Develop tab can be used instead.Warning:
Do not use sensitive personally identifiable information in training samples. Samples for entities flagged as sensitive should use synthetic data only.
Before uploading samples, make sure to check for problematic content, including profanity, talk of violence, or hate speech, and remove any samples that contain such content.
To add samples:
-
Select Sample from the actions bar above the table. An editor will launch with multiple lines to type in samples.
-
Use the Select Intent dropdown to choose the intent to which you want to add new samples.
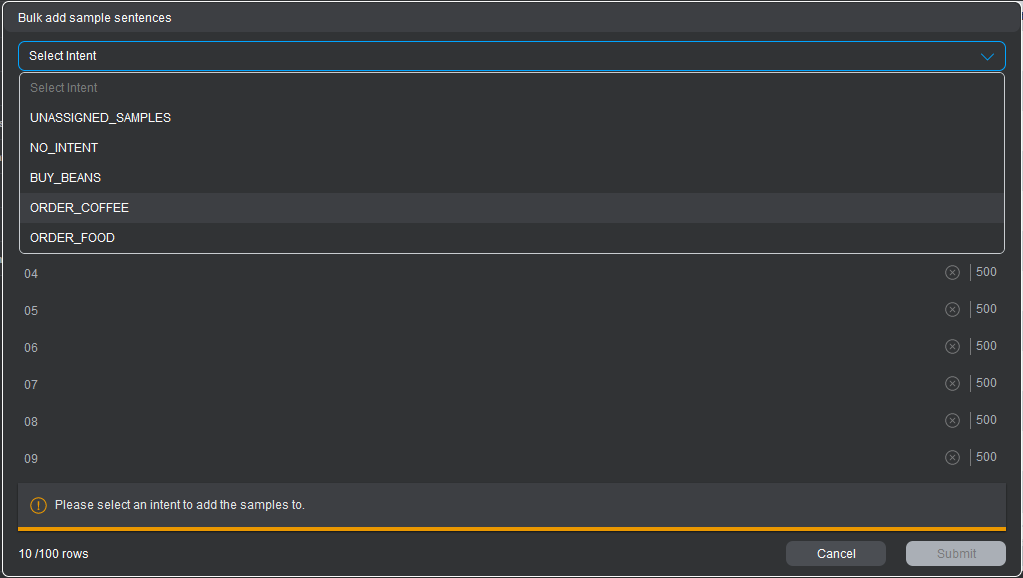 You can also select instead to apply Auto-intent to the new samples.
 -
Enter samples in the editor. There are a few ways to do this:
-
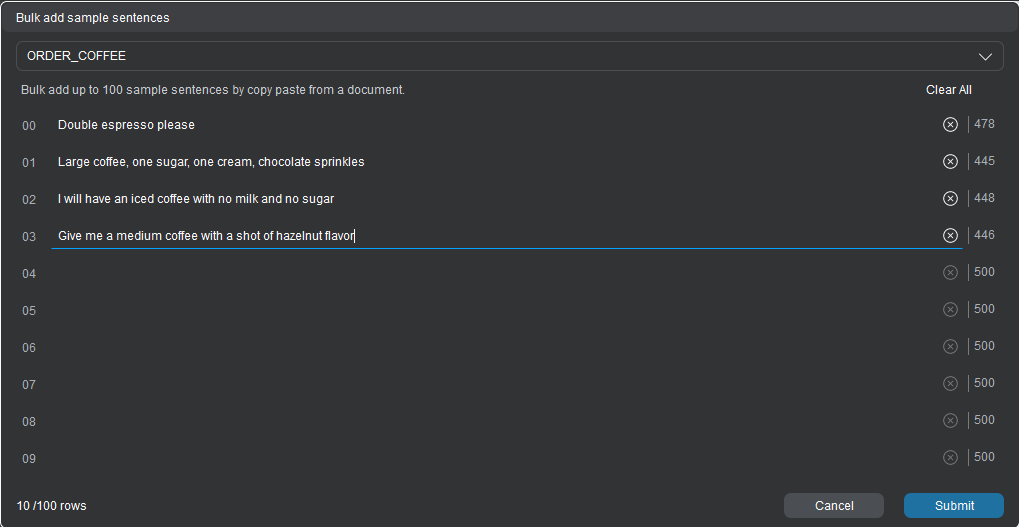
Type in a sample and press the Tab or Enter key or click the next line to enter another sample.
-
Copy-paste a list of samples from a word processor or other text editor. The samples need to be separated with hard or soft returns in the source for the editor in Mix to correctly divide them into separate samples. The samples will appear in the editor on separate lines.
-
-
Repeat as needed until you have entered all the samples you want to add.
-
Once you have added your samples, click Submit to add the samples.
If you chose an intent for the samples, the new samples should now appear in Optimize and in Develop under the intent. You can annotate the samples in either of these tabs.
If you chose to apply Auto-intent to the samples, the samples will appear in the table of samples with intent suggestions. You can then proceed to rename any newly detected intents, accept or discard the suggested intents, and annotate the samples.
Upload samples with text file import
The file upload feature in Optimize is similar to that in Develop, allowing you to upload a text file with samples. The file upload in Optimize allows for additional functionality however.
Warning:
Do not use sensitive personally identifiable information in training samples. Samples for entities flagged as sensitive should use synthetic data only.
Before uploading samples, make sure to check for problematic content, including profanity, talk of violence, or hate speech, and remove any samples that contain such content.
To add multiple samples at once via a text file upload:
-
In the top bar, click the
 file upload icon. An Upload a file dialog will open.
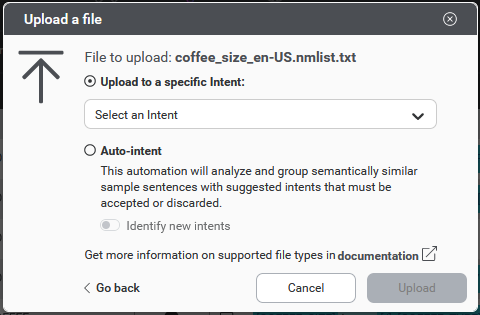
-
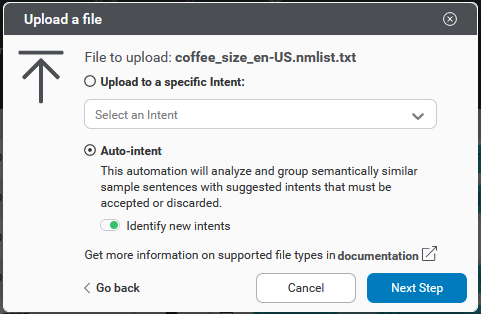
Use the file picker to select a .txt file containing samples or drag a text file onto the dialog window. You will then be given two options on how to handle the file:
- Upload to a specific intent: Import samples under one existing intent.
- Auto-Intent: Import a set of samples and apply Auto-intent to suggest, for each sample. Auto-intent can either look only for existing intents or it can search for both existing intents and newly detected intents.
-
Select the desired option.
- If uploading to a specific intent, select an intent as well.
- If you want to apply Auto-intent, select whether or not to try to identify new intents in the uploaded samples.
-
Click to proceed.
-
If you are uploading the samples to a specific intent, click Upload to initiate the upload, and you are done.

-
If you are applying Auto-intent, click Next step and proceed to step 5.
-
-
If you choose to apply Auto-intent to the uploaded samples, this will trigger a Health check of samples and model. The health check results may give you guidance on how to improve the performance of the Auto-intent. In some cases, particularly if your training set does not have a sufficient number of Intent-assigned samples, you will be blocked from proceeding until you remedy the issue. If you do not yet have a trained model in your project or the model is out of date, Mix.nlu will train a new model before proceeding with the Auto-intent. If there are no blocking issues, click Automate or Train and Automate as the case may be to proceed.
-
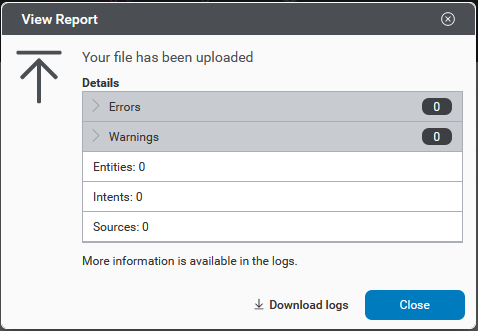
When the upload and processing of the file are complete, a pop-up View Report window appears. This gives summary information about how successful the upload was. For more details, you can click Download logs to download a CSV log file.
Samples uploaded to a specific intent are attached to that intent. You will want to go in and add annotations after uploading.
Samples uploaded with Auto-intent applied are added initially as UNASSIGNED_SAMPLES with the identified intents initially only suggestions. You will want to view suggested intents in Optimize and accept or discard those suggestions. See Auto-intent for more details on Auto-intent.
Related topics
Feedback
Was this page helpful?
Glad to hear it! Please tell us how we can improve.
Sorry to hear that. Please tell us how we can improve.